| Definition: A Participant is a person who participates in your study and provides data. This could be a patient receiving treatment or a test subject in a clinical trial. |
| Example: A Participant might have a specific demographic or medical condition that is required to participate in the study. |
You must add Participants to a Study before you can enter data for those Participants. There are different ways to add Participants:
Your study must have a Status of Available to add Participants.
Best Practice: OpenClinica recommends adding Participants at the site-level instead of the study-level. A site should be created for Participants even if they do not belong to a physical site. Before adding Participants, click the Change button in the header bar of Study Runner to select a site.
Study-level Participants can’t be created in bulk via API, added to Participate, or have data entered for them because CRCs and Investigators can’t see them. In addition relevance logic that requires that the user knows the site can’t be triggered at the study level.
Depending on the Study Settings, Studies can be Configured to Allow You to Do One of the Following:
- Manually enter the Participant ID.
- Automatically generate a Participant ID based on a predefined format template.
- Add Participants in batch using Web Services (for Administrators with Data Manager access).
Note: If you do not see the Add New Participant link above the Participant Matrix, either your User Role does not have access to add Participants, or the Data Manager has set a limit for the number of Participants allowed in the study, and your study has reached the maximum number of Participants. In addition, you cannot add Participants if a study has a status of In Design, Frozen, or Locked. If you are a Data Manager and want to change the maximum number of Participants allowed for a study, see the Study Settings information in Create a Study.
You Can Add Participants:
- Manually
- Automatically
- In a batch
You Can Build Your ID Template Using One or More of the Following Components:
- ${siteId}: The unique identifier for the site the Participant is being added to.
- ${siteParticipantCount}: The current number of Participants at the site. This is generally used like ${(siteParticipantCount+1)} to have the ID increment the Participant count for each new Participant added.
- ${helper.random(n)}: Generates a random number with up to n digits each time a Participant ID is generated.
- ?string[000]: Added to the resulting values to pad them with leading zeros to equal the number of digits specified, for example, ${(siteParticipantCount+1)?string[000]} or ${(helper.random(5))?string[00000]}.
- Prefixes, suffixes, separators – Include other text (such as – or a Study-specific prefix) to include standard content in each ID.
Note: Each ID Template must include #2 or #3.
Examples: The Participant Count Method template, ${siteId}-${(siteParticipantCount+1)?string[000]}, for site University Hospital (Site ID = UH) would produce the IDs, UH-001, UH-002, UH-003, etc.
The Random Number Method template, P-${(helper.random(5))?string[00000]}, would produce IDs with a fixed prefix of P- followed by a 5-digit random number (including leading zeros), for example P-00362, P-82394, P-35070.
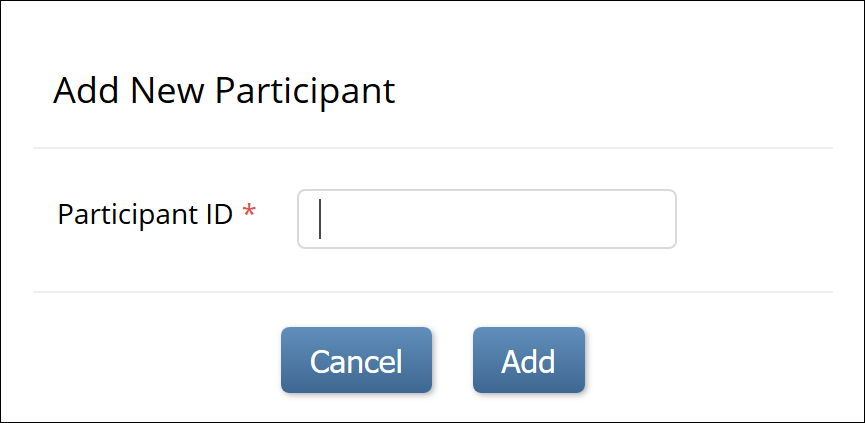
To Manually Add a Participant:
If your Data Manager has chosen the Manual Method of Creation:
- From the Tasks menu, select Add Participant, or on the Participant Matrix screen, click Add New Participant above the matrix.
- Enter a Participant ID in the Add New Participant screen. (This should be a unique identifier, e.g. 001).
- Click the Add button.
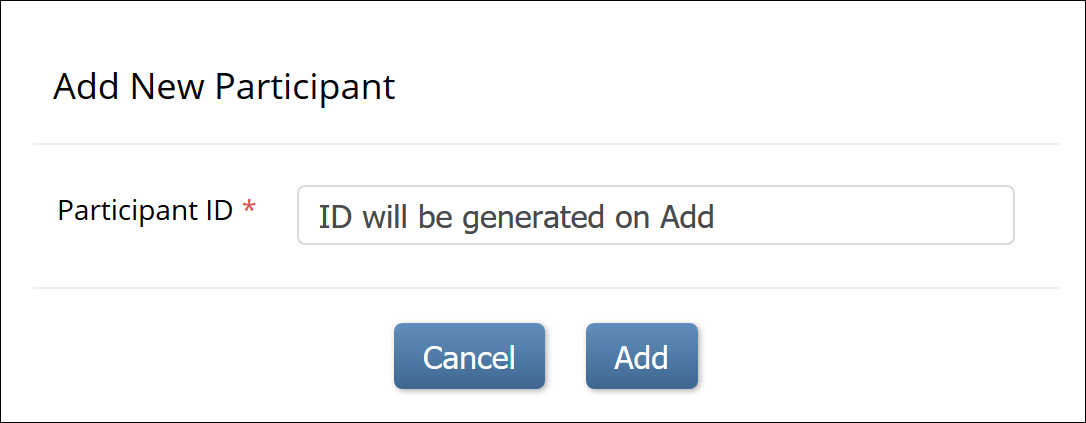
To Make the System Automatically Generate a Participant:
- Set the Method of Creation field to System-generated (see above).
- From the Tasks menu, select Add Participant, or on the Participant Matrix screen, click Add New Participant above the matrix.
- Click the Add button in the Add New Participant screen to generate a Participant ID.
To Add Participants in a Batch:
- From the User menu, select Administration.
- Click the Web Services Information button.
- Execute the API to create a batch of Participant IDs.
Once you have added a Participant to your study, you can enter data.