2.3.1 View Events
You can view information about all Events, or show only the Events that match criteria you specify:
- In the navigation bar, select Tasks > View Events.
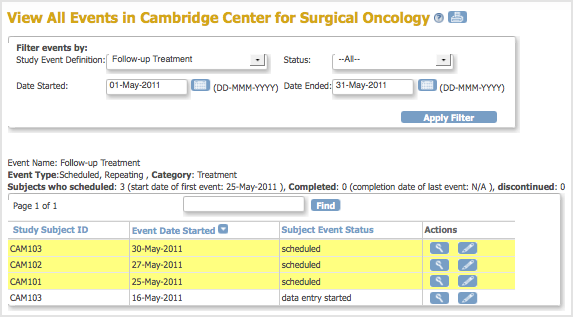
The View All Events page opens for the current Study or Site, presenting a filter. - Complete the fields in the filter to specify criteria for the Events you want to view. For example, specify Follow-up Treatment Events that occurred between May 1, 2011 and May 31, 2011.
- Click Apply Filter.
OpenClinica displays all Events that match your criteria in a series of tables, with one table of results for each Event Definition.
To print the results, click the Print icon at the top of the page.
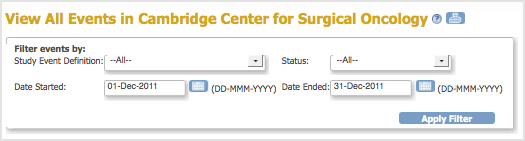
The View All Events Page Before Applying the Filter:
The View All Events Page After Applying the Filter:
2.3.1.1 About the Events Table
The View All Events page contains a table for each Event Definition that matches the criteria. Above each table is summary information for the list of Events the table contains. If a table includes more results than can fit on the page, use the arrows to view the other pages in that table.
By default, Events in the table are sorted by date, with the most recent Event shown first. To change the sort order, click the header of the column you want to sort by. To reverse the sort order in the column, click the column header again. An arrow indicates the order as ascending (up) or descending (down).
To find an Event within a table, type a string of characters in the find box, then click Find. OpenClinica finds matching strings in the Study Subject IDs or in Subject Event Status data, then shows only those Events in the table. To show all Events in the table after using Find, click Clear Search Keywords, which appears next to the Find button.
You can view details for an Event or edit the Event by clicking the View or Edit icon in the Actions column.
Yellow highlighting of a row indicates the Event Scheduled date has passed and data entry has not been started.
2.3.2 Update Events
You can update information for an Event, such as the date or status:
- In the Subject Matrix, click the View icon for the Subject.
The View Subject page opens. - For the Event you want to modify, click the Edit icon.
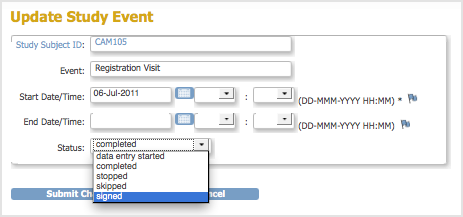
The Update Study Event page opens. - Change the date or other information. If you are changing the status, you are presented only with appropriate options, given your user Role, the Study status, and the status of CRFs for the Event. For more information, see About the Event Status.
- Click Submit Changes.
The View Subject page opens, showing the updated information for the Event.
2.3.3 About the Event Status
You can manually update the Event status as described in Update Events. For some conditions, OpenClinica automatically updates it.
There are different ways to view the status of Study Events, including these:
- Use View Events to see all Events that match criteria you specify.
- The Subject Matrix icons show the status for each Event for each Subject.
These are the different status values for Study Events and a description of how the status changes:
| Event Status | Icon | Description |
| Not Scheduled | After you add a Subject to a Study but but before you schedule the Event, the Event status is set to “not scheduled.” For certain Events, like Adverse Events, the Status might remain “not scheduled” throughout the Study. | |
| Scheduled | When you schedule a Subject for an Event, the Event status is automatically set to “scheduled.” | |
| Data Entry Started | After you schedule a Subject for an Event and you open any CRF for that Event, the Event status is automatically set to “data entry started.” The “data entry started” status applies even if you did not enter data. If you inadvertently open a CRF but do not want to save data, you cannot change the Status for the CRF to “scheduled” or “not scheduled,” nor can you change the Event status. To change the status you can instead delete the Event CRF or the Event for that Subject, then restore it when you are ready to enter data. | |
| Completed | After the status for all CRFs for an Event are marked complete, the OpenClinica system automatically sets the Event status to “completed.” If you make any changes to CRFs after an Event has a status of “completed,” the status of the CRFs and the Event Status remain “completed;” you might need to complete a Reason for Change Discrepancy Note, depending on your system configuration. You can manually set the Event status back to “data entry started,” and then again back to “completed,” as needed. | |
| Signed | When all CRFs for an Event have a status of “completed” or “not scheduled,” you can manually set the Event status to “signed.” When you sign the casebook for a Subject, the OpenClinica system automatically sets the status for all Study Events for that Subject to “signed.” After an Event status is “signed,” any changes to the CRF automatically change the Event status to “completed.” For more information, see Electronic Signatures in OpenClinica. | |
| Skipped | When a Subject does not complete an Event, manually set the Event status to “skipped.” | |
| Stopped | When a Subject has temporarily stopped participating in a Study, manually set the Event status to “stopped.” | |
| Locked | When you no longer want users to be able to enter or change data for an Event, manually set the Event status to “locked.” Note that you can set the status for a Study to “frozen” or “locked,” and while that does not change the status of any Events in the Study, it does prevent users from changing data. |
2.3.4 Electronic Signatures in OpenClinica
In OpenClinica, if your user Role has appropriate permission, you can sign a Study Event or an entire casebook for a Subject.
The OpenClinica electronic signature process complies with the FDA Code of Federal Regulations (CFR) Title 21 Part 11.
2.3.4.1 Sign an Event
When you sign an Event, you provide your approval of all CRF data for the Event for the Subject. To sign an Event:
- Follow the instructions in Manually Change Event Status, and set the status to “signed.”
- Click Submit Changes.
The Update Study Event page displays links to all information for the Subject for the Study; click a link to review the information. It also presents a statement about what signing the Subject record signifies.
- Enter your user name and password in the appropriate fields.
- Click Submit.
The View Subject page opens, showing the status for the Event as “signed.”
2.3.4.2 Sign a Casebook (Entire Subject Record)
When you sign a Subject casebook, which is also referred to as the complete Subject record, you provide your approval of all CRF data for all Study Events for the Subject.
- To sign the casebook, no Events for that Subject can have a status of “scheduled” or “data entry started.” When that is true, the Sign icon is listed in the Actions column for that Subject. Click the Sign icon.
- The Sign Subject page opens, showing links to all information for the Subject for the Study; click any link to review the information. The page also presents a statement about what signing the Subject record signifies.
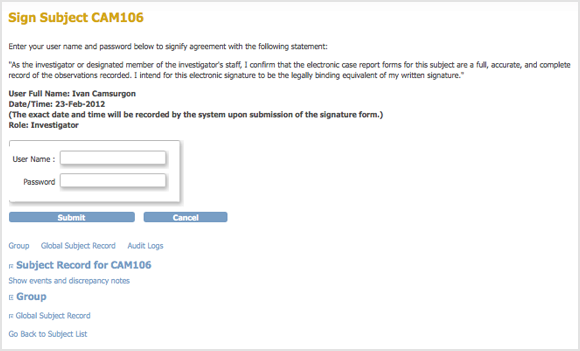
- Enter your user name and password in the appropriate fields.
- Click Submit.
The Subject Matrix opens, showing the status for all Events as signed.