If Participate has been activated for your study, and Participate Forms have been designed, those Forms are available for Participants to complete. Each Participant must first be invited to Participate prior to completing those Forms (with the potential exception of Public URL forms). CRCs and Investigators (and any custom roles that are based on those roles) have access to invite Participants.
Note: In order to add participants, you must have at least one site associated with your study. You can create a site by clicking Add New on the Share screen.
Add a Participant to a Participate Study:
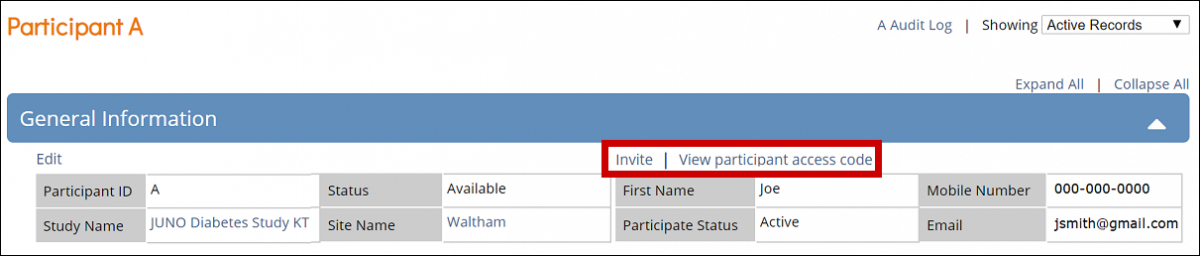
Once the Participant has been added to the study, the Participant Details screen appears for Investigators and CRCs. For site users with appropriate access, the Participant Details screen includes the Invite a participant and View participant access code links:
Invite a Participant to Complete Participate Forms:
- In the General Information section of the Participant Details screen, click Invite.
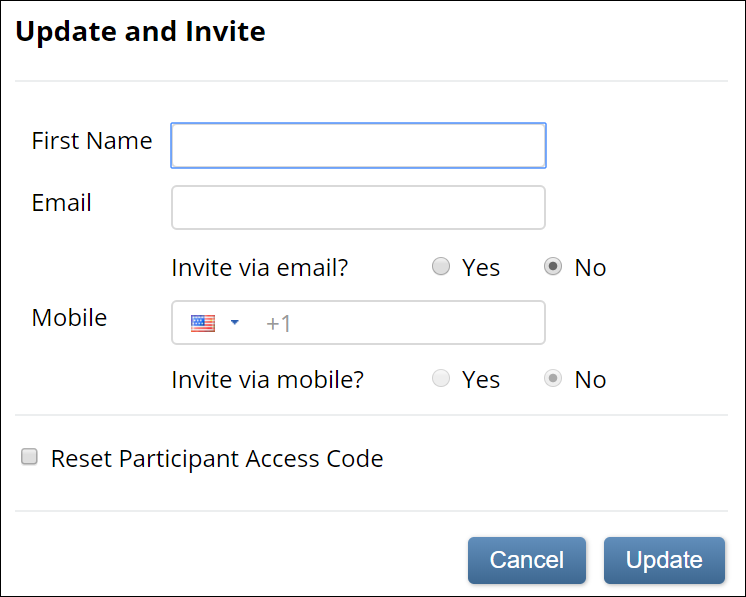
- Create a Participant account:
- For use on a device used in-clinic: All Participate fields are optional.
- For use by Participant on personal device: Enter the First Name and Email or Mobile, and select Yes on either Invite via email or Invite via mobile (or both).
- Click Update to create the account and Participant access code.
- Note that the invitation is sent in the study default language or a supported language. For more information about supported languages, see Language Support.
- The initial invitation is sent using the site user’s selection, whether it is the default language or a supported language.
- Once the Participant has logged in, if another invitation is triggered, it will be sent:
- in the language the Participant has previously logged in with if it is a supported language.
- in the default language if the language the Participant has previously logged in with is not a supported language.
- Note that the invitation is sent in the study default language or a supported language. For more information about supported languages, see Language Support.
OpenClinica Enforces the Following Limits for Each Field:
- First Name is limited to 35 characters.
- Email is limited to 255 characters.
- Mobile is limited to 17 characters, including the country code.
To ensure privacy and security, all Participant Personal Identifying Information (PII) entered via the above window is encrypted in the database. The unencrypted information is only visible to CRC-based roles and Investigator-based roles, and only on the Participant Details screen. Note: Fields within Participant-facing or site-facing forms are only treated as PII when specifically identified as Participant Contact Information in the form definition as described in Design Participate Forms.
Once the information has been updated, the Participant’s contact information appears on the Participant Details screen.
The Audit Log includes entries for Participant account creation and updates based on use, but masks all Personally Identifiable Information as appropriate based on User Role. Note: Fields within Participant-facing or site-facing forms are only treated as PII when specifically identified as Participant Contact Information in the form definition as described in Design Participate Forms.
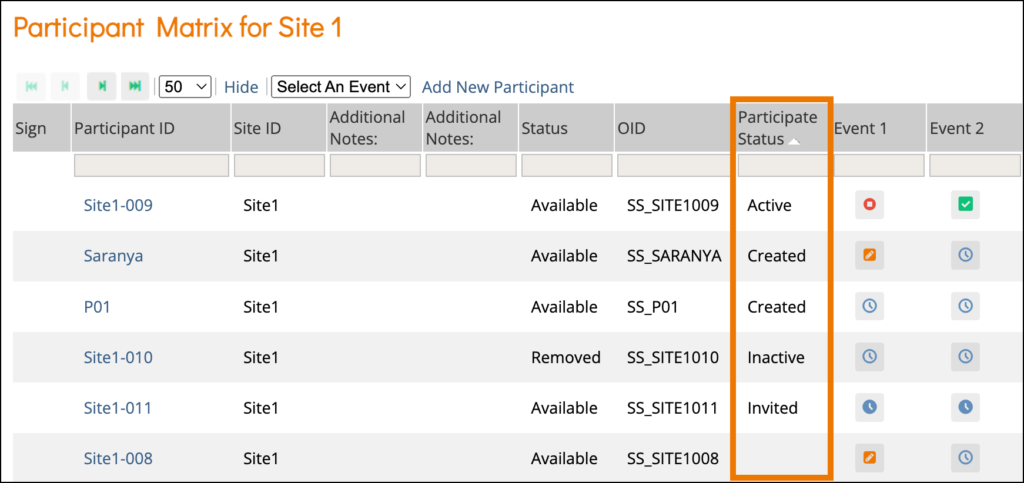
The Participant Status appears on the Participant Details screen and is defined as follows:
Status | Definition |
Created | The Participant account was created, but the invitation has not yet been sent, and the Participant has not yet accessed Participate. Both Invite via email and Invite via mobile were set to No. |
Invited | The Participant account was created. An invitation was sent via email and/or mobile, but the Participant has not yet accepted the invitation. |
Active | The Participant has successfully accessed Participate and can complete forms. |
Inactive | The Participant has been removed from the study. (Data Managers and Investigators can remove Participants. Any data associated with removed Participants can be viewed but cannot be edited or extracted from the database. |
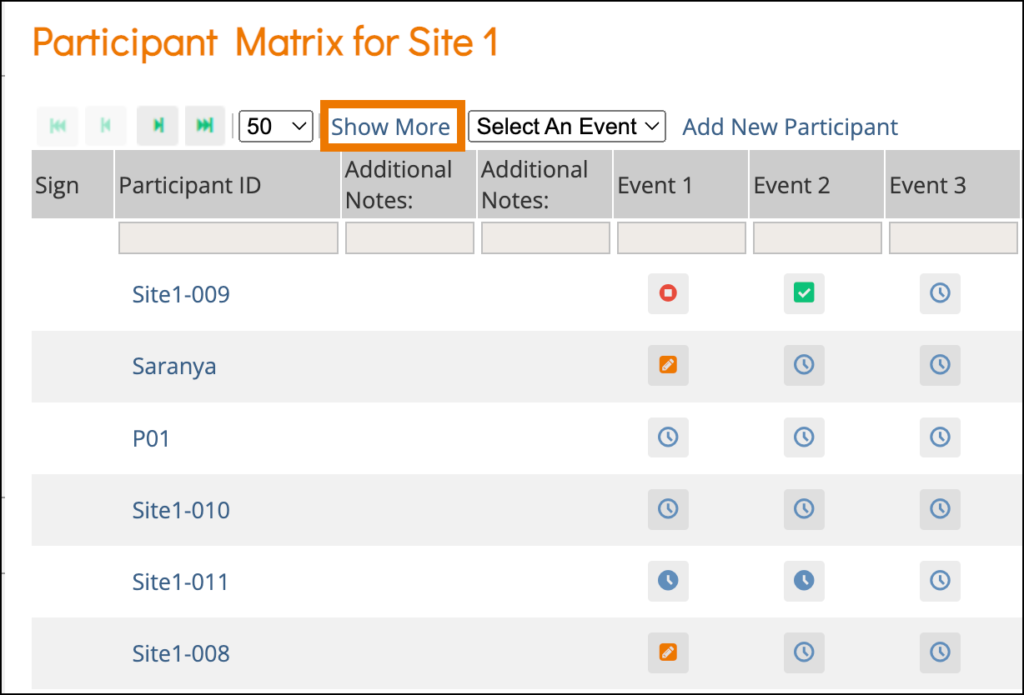
Schedule Events as appropriate for the Participant. Participants only have access to forms that are in events with a status of Scheduled or Data Entry Started.
Forms that have been identified as Participate Forms can be completed by Active Participants as well as CRCs and Investigators. When the Participant enters data into a Participate Form, that Form data is immediately available in OpenClinica for review.
Invite Participant Errors
OpenClinica generates the following errors if you attempt to invite a Participant with an invalid email or phone number.
- Invalid email address: If the Participant’s email address is invalid, Invalid email address appears under the Email field, and you cannot click Update.
- Invalid mobile number: If the Participant’s mobile number is invalid, and you select Yes only for Invite via mobile, the message, Oops! Mobile invitation to the participant could not be sent. Please ensure mobile number is correct, or try again later, appears.
- Invalid email address and mobile number: If you select Yes for both Invite via e-mail address and Invite via mobile, a message regarding the success/failure of both email and mobile appears.
Note: When you invite a Participant to a study, the system is actually creating a user with a User Type of Participant. Though they are defined as “users,” they are not listed on any of the user listings or extracts. Specifically:
- If you click the Tasks menu and select View Study, users with a User Type of Participant are not listed in the User table.
- If you download the study metadata, Participant users are not included in the XML.
- If you download a casebook in XML or JSON format, Participant User Types are not included in the results.
- Participant users are not available in the user search boxes (For example, when assigning a query).
- Participant users are not listed on the Share screen (available to Data Managers and Administrators).
- Participant users are not displayed in the Central User Administration screen (available to Administrators only).
- The Audit Log does not contain any identifiable information about Participants.
- Extracts do not include identifiable information about Participants.
- XML extracts do not include Participant User Types.
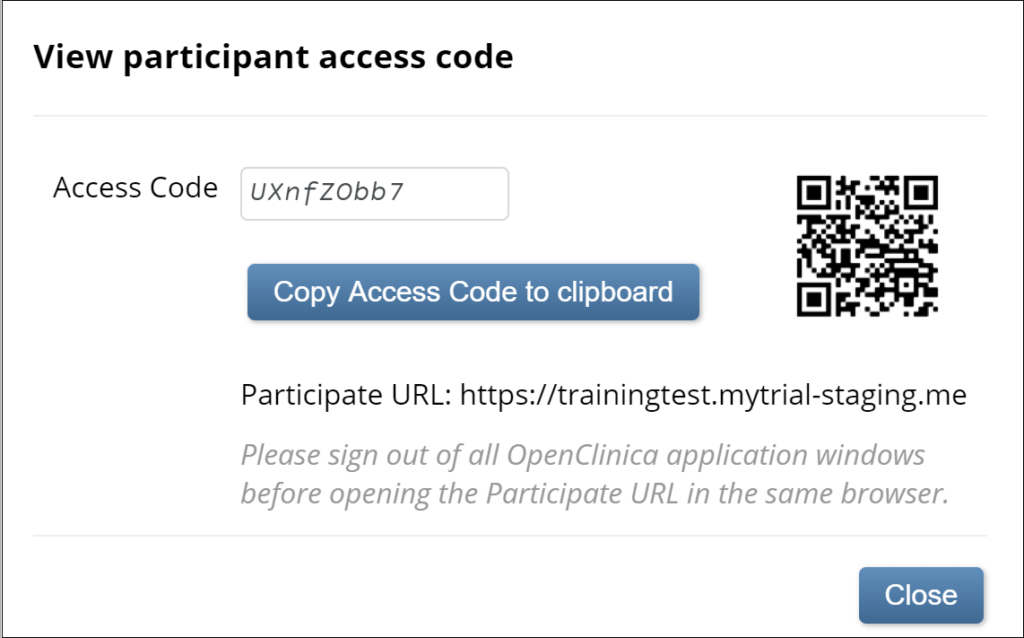
View Participant Access Code
For Studies that have been designed to collect Participant data in-clinic rather than on individual Participant devices, CRCs and Investigators might need to view the Participant access code in order to allow the participant to enter data on a clinic-provided device.
CRCs and Investigators have access to view Participant access codes as long as the Participant has a status of Created, Invited, or Active.
Note: Viewing the Participant access code should only be done if it is defined as a permitted action in the Study Protocol. Though the action of viewing the code is tracked in the audit log, once that code has been viewed, anyone with that code could enter data as the Participant. There is no way to distinguish in the audit log whether the data was actually entered by the Participant or by the CRC or Investigator who viewed the access code.
If you have any questions regarding whether you should view the access code or not, please check with your Study Monitor or Data Manager prior to viewing the code.
Once you have taken the above note into full account, to view the access code:
1. In the General Information section of the Participant Details screen, click the View participant access code link.
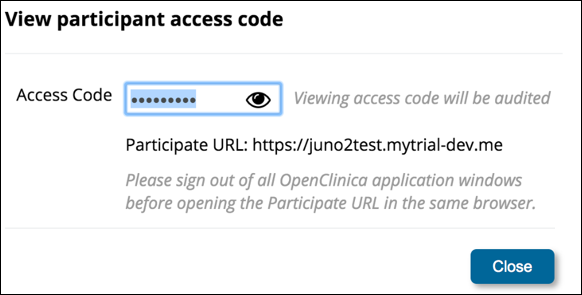
2. If you are certain that viewing the code is permitted in your study, to view the code, click the Eye icon.
To copy the code, click the Copy Access Code to Clipboard button. Once you have viewed the code, a QR code appears.
Remove a Participant from a Participate Study
Remove a Participant from a Participate study by clicking the Remove button on the Participant Details screen:
- The Participant status in the Participant Matrix is set to Inactive.
- The Participant status in the General Information section of the Participant Details screen is set to Removed, and the contact information and links are removed from the screen.
- The Participant’s access code is deactivated and that Participant tries to access Participate, an authentication error appears.
If the Participant is restored, the statuses, access, and participant details are restored to their previous settings.