| Definition: A study uses Events and Forms to collect Participant data for the study’s purpose (e.g. to determine the safety and efficacy of a new treatment.) |
| Example: A study could be a trial of a new medication intended to treat diabetes. |
The Study Build System is where you design and set up your study. Study Runner is where you collect and review data.
The process of creating a study starts in the Study Build System and continues in Study Runner.
Only users with a User Type of Administrator and a User Role of Data Manager can create a study.
For information on User Types and User Roles, see User Access and Sharing.
To Create a Study:
- With a User Type of Administrator and a User Role of Data Manager, log into the OpenClinica Study Build System.
- Click the Add a new study link in the header or scroll to the bottom of the page and click Add a new study.

- Enter data in the fields that appear on the Add a new study window.
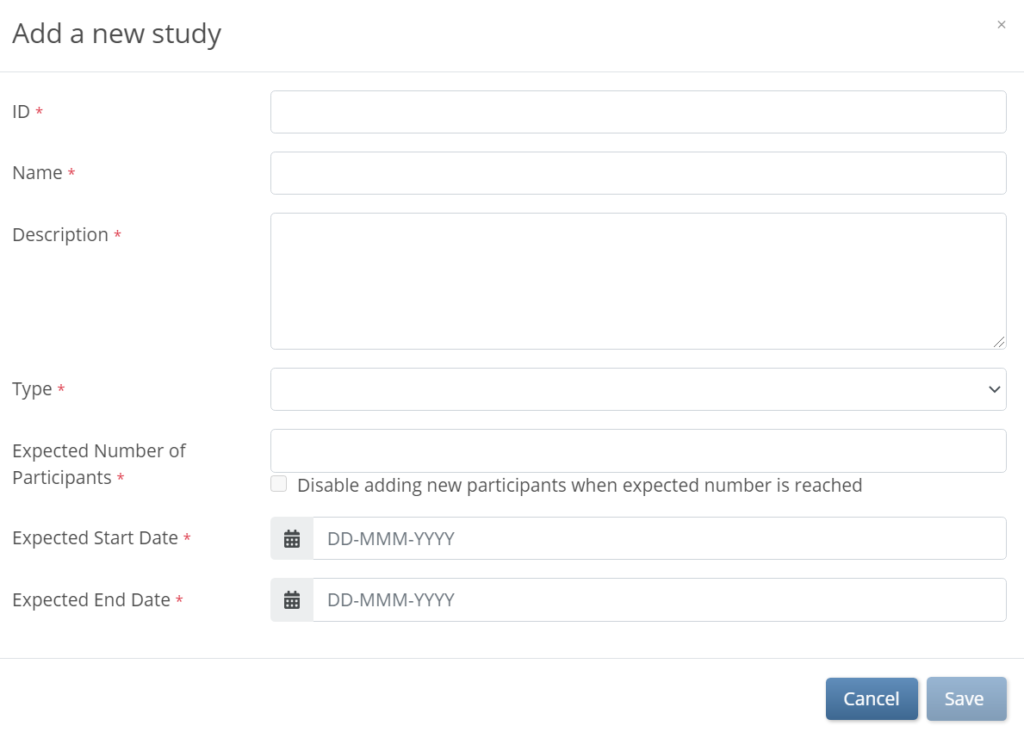
- The Study ID cannot have more than 30 characters.
- Click the Save button.
To Set a Limit on the Number of Participants:
- On the My Studies page, click the Gear button
 on your study’s card and select Settings.
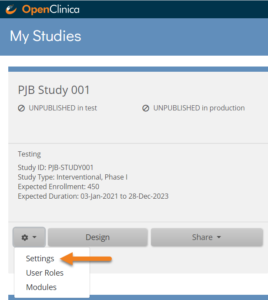
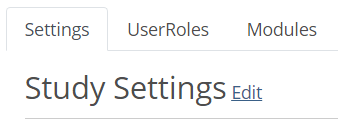
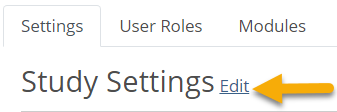
- In the Settings tab, click Edit.
- Check the Disable adding new participants when expected number is reached checkbox.
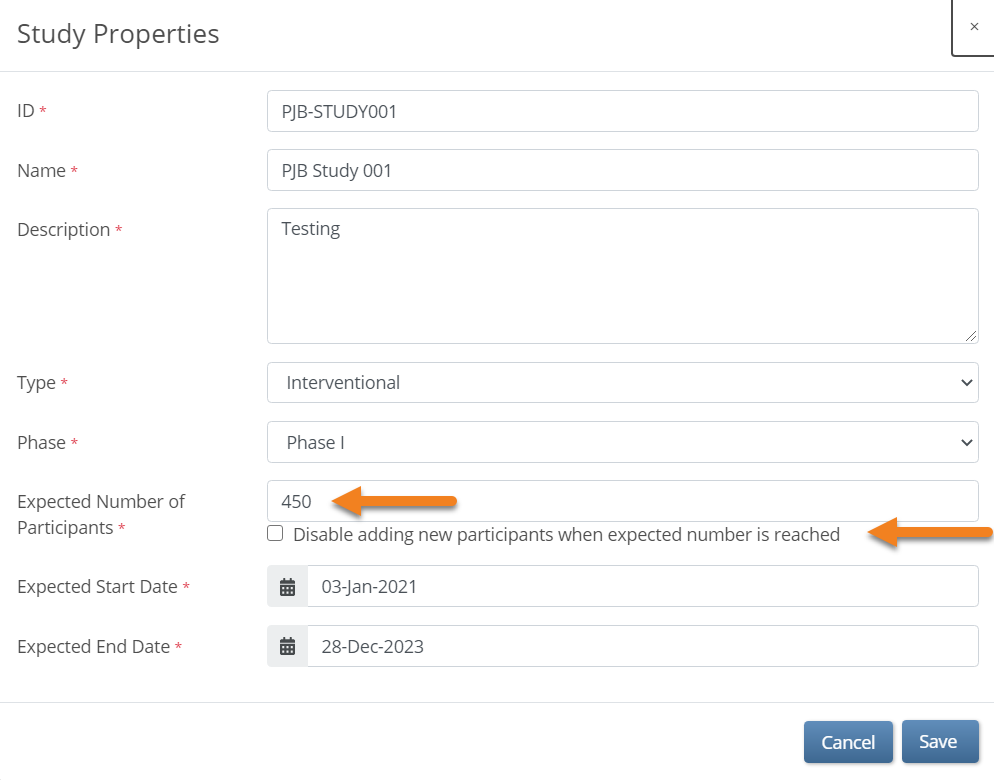
For example, if you enter 100 in the Expected Number of Participants field, once the number of study Participants reaches 100, site users will no longer be able to add Participants.
Note: The total number of Participants includes Participants with a Status of Available or Signed. Participants with a status of removed are not included in the total number. You can view the current number or percentage of Participants in each Status in the Participant Status Count table on the Home screen of your study.
To Change the Study Settings:
- Click the Gear button and select Settings from the drop-down list in any of the following locations:
- The My Studies screen
- The Design screen
- The Share screen
- To open the Study Properties screen, click the Edit link to the right of Study Settings.
- Change data in the appropriate field(s).
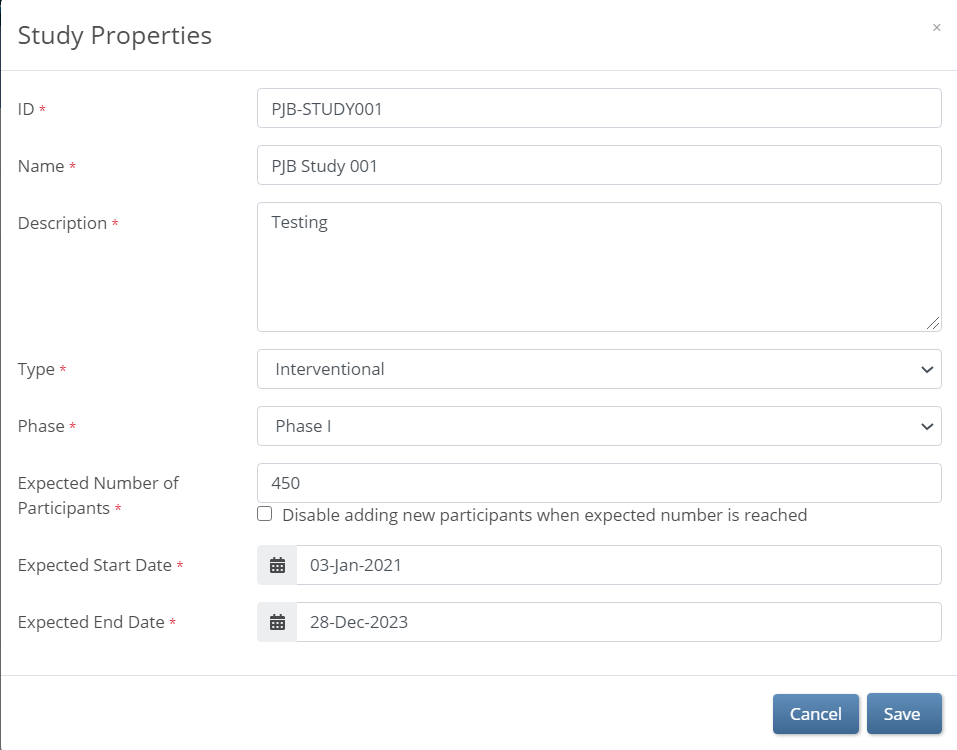
- Click the Save button.
Note: You can change settings at any time. The changes take effect immediately without requiring the study to be republished.
Navigating the My Studies Screen
| Button | Name | Description |
|---|---|---|
| Settings | Click this button to go to Settings, User Roles, or Modules. A user can change settings if they have a User Type of Data Manager. Otherwise, users can view the settings. | |
| Design | Click this button to go to Study Designer. This button is only available to users with a User Role of Data Manager. | |
| Share | Click this button to go to the Share screen in the Test or Production environment, depending on which environment(s) the study has been published to and which environment(s) you have access to. | |
| Go | Click this button to go to your study in the Test or Production environment, depending on which environment(s) the study has been published to and which environment(s) you have access to. |