2.6.5.1 Notes and Discrepancies Table
Use the OpenClinica Notes and Discrepancies table to view a summary of Notes and Discrepancies for the current Study or Site.
A quick way to see the table with only the Notes and Discrepancies assigned to you is from the OpenClinica home page. The home page opens when you first log in to OpenClinica, or you can access it at any time by clicking Home in the navigation bar. The home page reports how many Notes and Discrepancies are assigned to you in the current Study or Site. Click the link to see those Notes in the Notes and Discrepancies table.
To view the table of all Notes and Discrepancies for the current Study or Site, click Notes & Discrepancies in the navigation bar. From the table, you can also find Notes and Discrepancies that match criteria you specify, and take action on individual Notes. The features you can access depend on your user Role in OpenClinica.
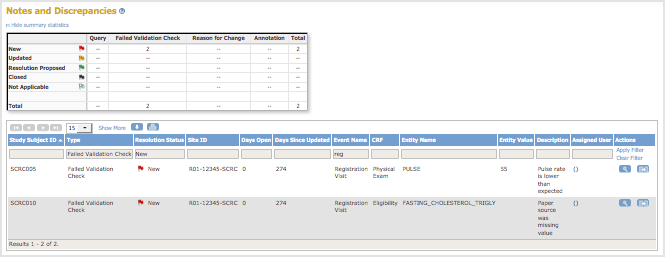
At the top is a table of summary statistics, which you can show or hide.
Below the summary statistic is the main table, which contains one row for each Discrecpancy Note. In this table:
- Entity Name refers to the CRF Item that the Note is associated with.
- Entity Value is the value recorded in the CRF for the Item.
- Description is the description provided in the Discrepancy Note.
- Assigned User is who the Discrepancy Note is assigned to, if anyone.

2.6.5.2 Actions to Take for Discrepancy Notes
Following are actions you can take for Notes and Discrepancies, from the Notes and Discrepancies table.
- Print: To print the table in its current view, click the Print icon, which is above the column headers.
- View More Information for Notes: To see the detailed description and other information for all Discrepancy Notes, click the Show More link, which is above the column headers.
- View Details for a Note: To view all details for a single Discrepancy Note, click the View icon in the Actions column for that row. The Discrepancy Note opens in a window. To close the Discrepancy Note, click Exit Window.
- View CRF and Note Details: In the Actions column, click the View within Record icon
 . OpenClinica opens the Discrepancy Note and the CRF page the Note is associated with. The CRF and Discrepancy Note will open in edit mode as long as the form is in an editable state. You may also edit data in the opened CRF page. After you close the Note and the CRF, OpenClinica displays the Notes and Discrepancies table. You may only view the data on the page, and modify the Discrepancy Note if one or more of the following conditions is met:
- Locked form (i.e. a form within a locked event)
- Skipped or stopped event
- Study or site unavailable or locked
For frozen studies or sites, study-level users can open forms in edit mode from the View within Record icon in the Queries table, but site-level users cannot. Additionally, roles without edit privileges, such as monitors, can still only open the form in a non-editable mode from this table. Note: The non-edit mode still allows them to add Queries.
- Update a Note: For instructions to update a Discrepancy Note when you view it, see Update a Discrepancy Note.
- Find and Organize Notes
- Download Notes
2.6.5.3 Organize and Find Discrepancy Notes
These features help you organize and find Notes and Discrepancies using the table. They are similar to the features you use to find and organize data in the Subject Matrix.
Number of Discrepancy Notes Per Page
The bottom left corner shows the total number of Discrepancy Notes relevant to you as well as the number currently in view. When there are more Notes than can be listed on the page, use the green arrows above the table to scroll through the pages of Notes. When there is only one page of Notes, the arrows are gray.
To change the number of Notes shown on a page, click the drop-down list next to the arrows and select a value: 15, 25, or 50 per page.
Sort Notes By Column
To sort the table by Study Subject ID, Days Open, or Days Since Updated, click that column header. To reverse the sort order, click the column header again. An arrow next to the column header indicates the current sort order: up for ascending and down for descending.
For example, click Study Subject ID to show Notes in that order, with the lowest Study Subject ID value first. Click the column header again to show the highest Study Subject ID value first. The arrow in the column header then points down.
Filter Notes to Show Only Matches for Specified Criteria
You can filter the information shown in the Notes and Discrepancies table to show only Notes and Discrepancies whose data matches criteria you specify:
- For the column whose data you want to filter, click the gray field below the column header.
- What you enter in a field depends on the type of field:
- If a drop-down list displays, select the value you want from it; a value representing your selection appears in the gray field.
- If no drop-down list displays, type the string of characters you want to include, and press Enter or click Apply Filter (which is to the right of the gray fields).
- Repeat the above steps to filter by additional columns.
- To remove filtering for a column, either clear the text you typed, or from a drop-down list, select the empty (top) item. Then press Enter or click Apply Filter.
When filtering is applied, only those Notes and Discrepancies that contain the data you specified are shown.
To clear the filter and show all data, click Clear Filter (which is to the right of the gray fields).
Example of Sort and Filter in Notes and Discrepancies
- For Type, select the Failed Validation Check option.
The field displays the option (or a numerical code representing the option). - Press Enter or click Apply Filter.
The table shows only Notes of the Failed Validation Check Type. - For Resolution Status, from the drop-down list in the gray field, select New.
The field displays that option (or a numerical code representing that option). - Press Enter or click Apply Filter.
The table shows only Notes whose Status is New and whose Type is Failed Validation Check. - For Event Name, in the gray field, type Reg, and press Enter or click Apply Filter.
The table shows only Notes whose Event includes Reg in the name, whose Status is New, and whose Type is Validation Check. - Click the Study Subject ID column to sort by that column.
The rows in the table are in Study Subject ID order, with the lowest value first.
Example of Notes and Discrepancies Table After Filtering and Sorting:
2.6.5.4 Download Discrepancy Notes
You can download Discrepancy Notes to a file:
- Use the Notes and Discrepancies Filter so the table shows only the Notes you want to download. All data for those Notes will be downloaded, that is all the data that appears when you click Show More, even if you did not click Show More.
- Click the Download button
 , which is located above the column headers.
The Download Notes window opens.
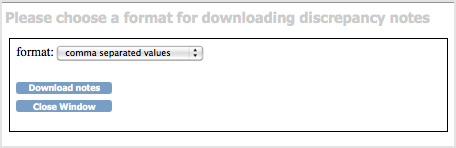
- Select the format for the downloaded file from the drop-down list:
- Comma separated values (CSV), which is best for use with other software, such as a spreadsheet or database.
- Portable document format (PDF), which creates a file that is easy-to-read and to print.
- Click Download notes.
Depending on your browser settings, you might be prompted to open or save the downloaded file. - In the downloaded file:
- The CSV file contains one row for each Note, whether it is a child or parent Note.
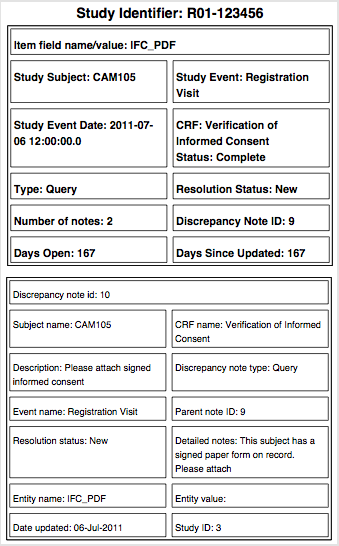
- The PDF file shows a parent Note in bold, followed by the child Notes associated with the parent Note, in the normal font style.
- In the Download Notes window, click Close Window.
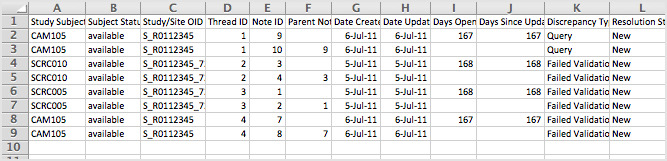
Example of Page from Downloaded Discrepancy Notes, PDF File:
Example of Records from Downloaded Discrepancy Notes, Comma Sepated Values File: