The first time you log in to OpenClinica, you must use a local account with Business or Technical Administrator privileges (i.e. root). Once you have created the first LDAP/Active Directory account in OpenClinica with Business or Technical Administrator privileges, you will not need the local account again (unless you are using web services.)
Follow these quick steps to add an LDAP/Active Directory
1. Select Tasks > Users (under the Administration section)
2. Select the Create New User link and you will be presented with the Create a User Account page.
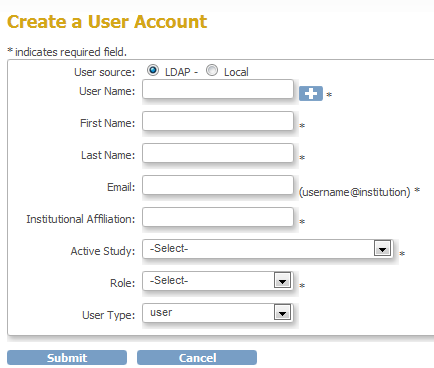
3.When LDAP/Active Directory authentication is enabled, the LDAP radio button will be pre-selected
4.Select the + next to the User Name field and a popup window will appear

5. Enter search criteria in the text box to find an account in the LDAP/Active Directory system based on either user name or email address and select Find
Only users that have been assigned to a particular Group in the LDAP/Active Directory system will be searched against. The Group is defined by your Systems Administrator in the Administration > Users > Configure Password Requirements screen.
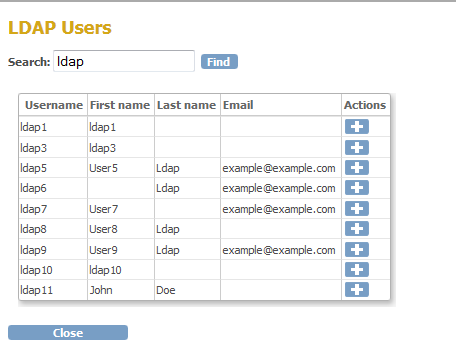
6. Select the to populate the users information to the Create a User Account page
7. The popup window will close and you will be brought back to the Create a User Account page
a. Depending on the amount of information contained in the LDAP system, the following fields will be populated:
i. User Name
ii. First Name
iii. Last Name
iv. Email
v. Institutional Affiliation
b. The following fields will still need to be configured:
i. Active Study
ii. Role
iii. User Type

The user account is now created. This user can log in to OpenClinica and the system will authenticate with the LDAP system. All Study or Site privileges will continue to be managed by OpenClinica. This new user can be assigned to any other Study or Site you determine
8. Select or Enter values for the remaining required fields as indicated by the * symbol to the right of the field. Select the ‘Submit’ button.