Overview
Typically, Monitors and Data Managers are responsible for reviewing data, but anyone with access to the Participant Matrix can view/review data as needed.
Reviewing the Participant Matrix
If a Participant terminates their participation in a study, you might need to remove them from the Participant Matrix.
But if that Participant later decided to re-join the study, you would need to restore the Participant on the Participant Matrix.
Data Managers can also reassign a participant to a different site.
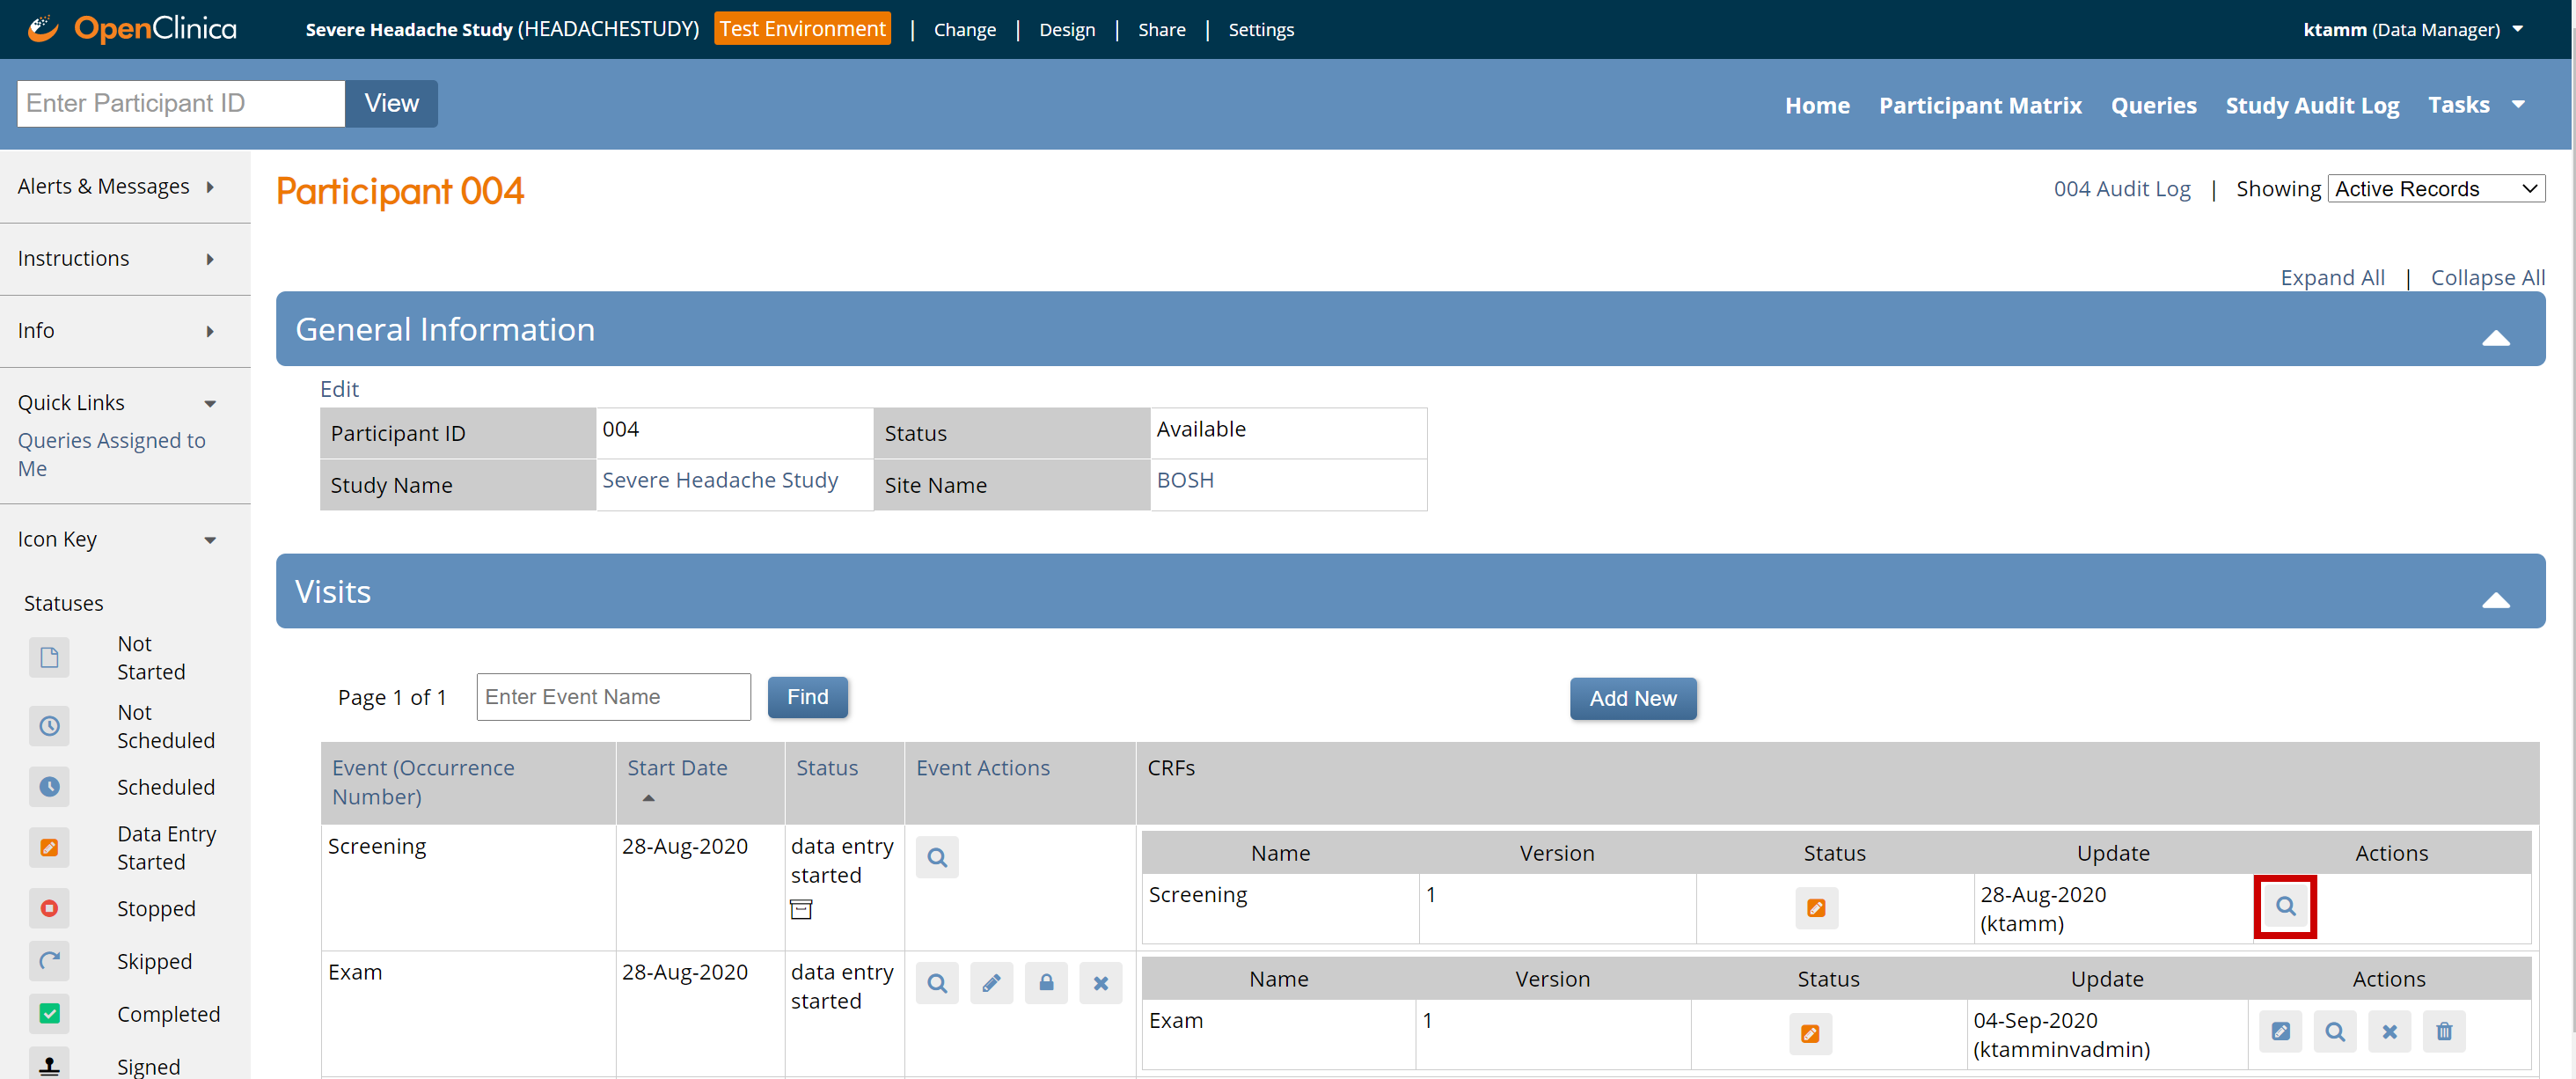
Review Participant Data
To review data, click the View icon for the participant whose data you’d like to review.
To review data on a specific form, click the View icon for that form.
Remove a Participant
Data Managers have access to remove Participants. Removing a Participant does not delete the Participant, but instead removes access to that Participant’s data. The data for that Participant can still be viewed, but cannot be edited and will not be included in data extracts.
Restore a Participant
Once a Participant is removed from the study, the remove icon changes to a restore icon. To restore access to that Participant’s data, simply click the restore icon and the data is available again for editing and extracts.
Reassign a Participant
Data Managers also have access to reassign a Participant to another Site. This may be needed if a Participant moves to a different location but still wants to continue on the Study. Prior to reassigning, be sure that the original Site has an extract of that Participant’s data. Then, to reassign a Participant, click the Reassign icon. Specify the new site and click Reassign Participant.
The new site has immediate access to that Participant’s forms and all data previously collected for the Participant. The original site no longer has access to that Participant’s ongoing data.
Review Participant Data
To review data, click the View icon for the participant whose data you’d like to review.
To review data on a specific form, click the View icon for that form.
Filter Participant Details
As you review data, you can enter search criteria for the Common Events – for example, to show only AEs that are ongoing. You can also change the number of rows listed for any of the Common Events, and you can sort Common Events by clicking the toggles next to any of the column headings. When you customize anything related to what is displayed for Common Events, the Custom View On button displays at the top of the Participant Details screen.
The Custom View is active for that participant throughout the time you are logged into OpenClinica. If you view a different Participant’s details, the view may not be customized, or if it is, it may be a different customization. In the example above, throughout the current session, any time you view participant 001, that same custom view is in effect.
To clear a custom view, click anywhere on the Custom View On button and all view customizations are removed for that participant.
Signing Participant Records
Investigators (a site-level role) and Data Specialists (a study-level role) can sign Participant records.
Participant records can be signed on an event-by-event basis or, once all events for a participant are in a final state, the complete Participant can be signed.
Data should be reviewed prior to signing.
Note:
- If an Event is signed, changes to an item in a Form in that Event removes the signature. This also occurs if an Event Status is changed from completed, stopped, skipped or Not Scheduled after being signed. In addition, this changes the Participant Status from signed to available and the Event Status to completed.
- Archiving/unarchiving or removing a Form will unsign the Event. The exception is that when archiving/unarchiving, a Form with a status of Not Started will not be unsigned.
- Multiple users can sign an Event, so even if an Event has already been signed, the Sign Action will still be available. If there are multiple signatures, the most recent one appears on the Form, and the others appear in the Audit Log.
The Signing Process
When you click the Sign button, the Electronic Signature screen displays and includes an attestation, your full name, and an option to enter your username and password as your electronic signature.
If you scroll to the bottom of the page you will see list of forms in the Event and the status of queries for each of those forms:
You will then enter your username and password and click Submit to complete the electronic signature process.
Signing Participant Records for One Event
If you are an Investigator or Data Specialist, you can sign an Event to indicate that all Forms have been reviewed and approved.
Events must have a status of completed, stopped, or skipped before they can be signed. The Event cannot have been archived or removed. To sign a participant event, first review the data captured in the event, then change the status to signed.
To Sign a Single Event from the Participant Details Screen:
Click the Sign button in the Event Actions column on the Participant Details screen.
To Sign a Single Event from the Update Study Event Screen:
Click the Edit button in the Event Actions column on the Participant Details screen. On the Update Study Event screen, click the Sign button under Other Actions.
To Sign A Common Event:
Click the Sign icon in the Actions column.
Signing Participant Records for All Events for a Participant
If all Events for a Participant are in a final state (Not Scheduled, Completed, Stopped, or Skipped), then the entire Participant record can be signed at one time. The Participant Matrix provides a signature icon for any Particpant whose entire record can be signed.
To Sign for Multiple Events for that Participant:
Click the Sign button in the Actions column of the Participant Matrix.