Definition:
Potential Uses:
Considerations:
|
Device Setup for Offline Forms
After a form has been configured for Offline Data Capture, it needs to be set up on the device where the data will be captured so it can be used while offline. The URL that was created on the Site Configuration page is what will be used to access the form.
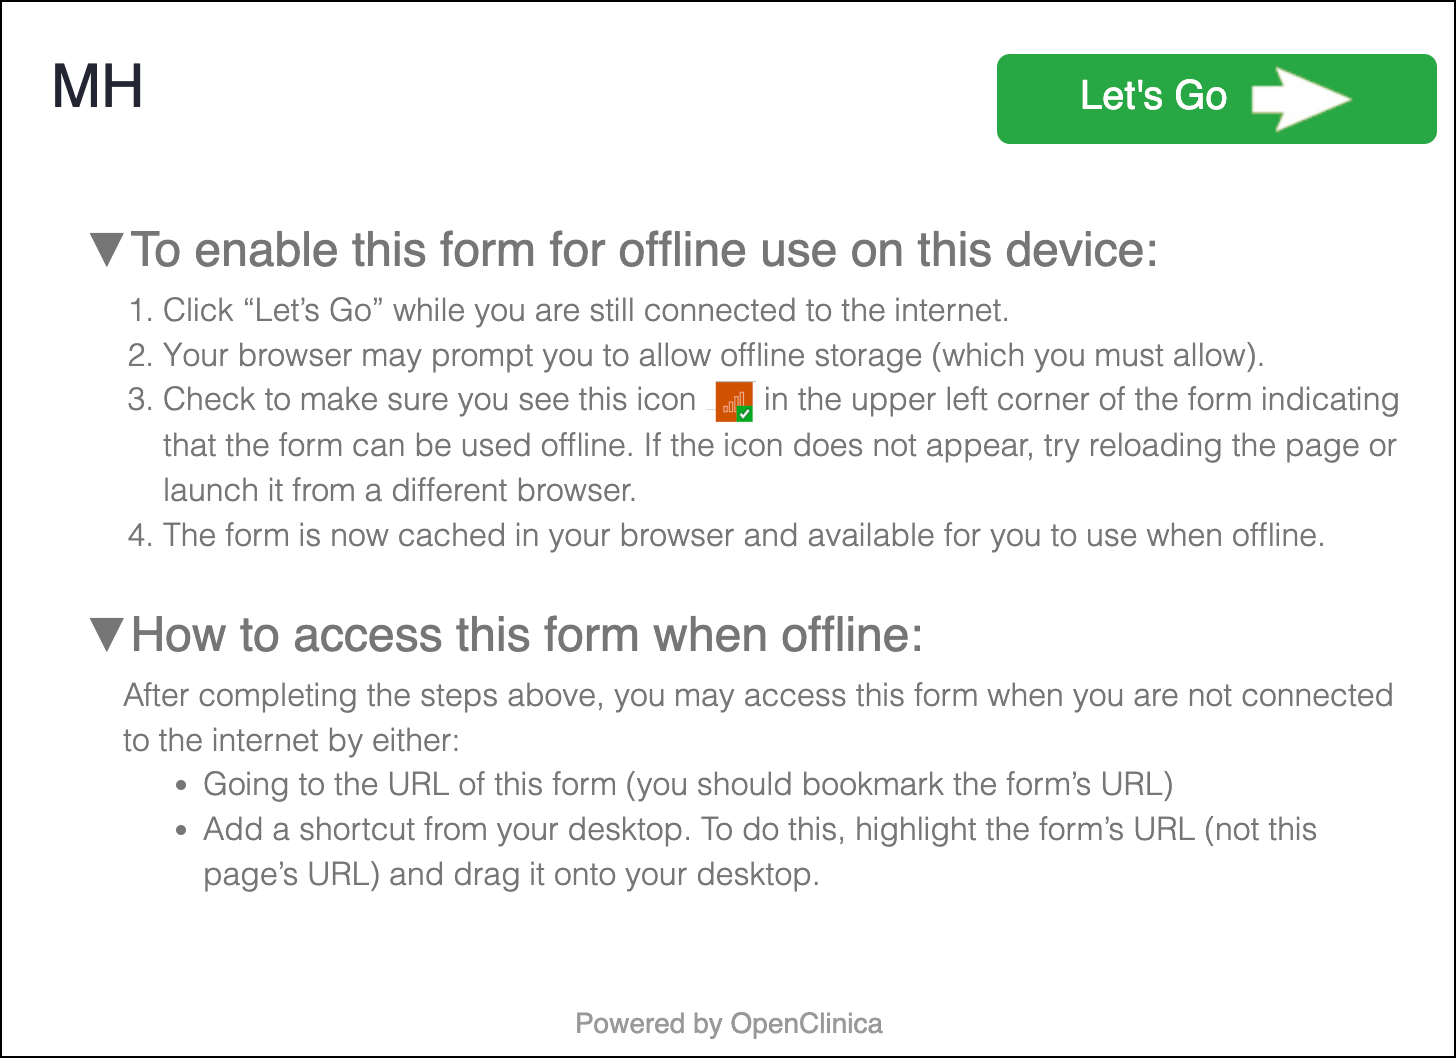
- From the device that will be used for Offline Data Capture, first open the form while online by going to the form’s URL.
- Click “Let’s Go” while you are still connected to the internet.
- If your browser prompts you to allow offline storage, you must allow this for the form to work offline.
- Check to make sure you see this icon
 in the upper left corner of the form. This icon indicates that the form is cached in your browser and available for you to use on this device while offline.
- If the icon does not appear, try reloading the browser page. If it still does not appear, try using a different browser.
- After confirming that the icon is visible on the form, add a bookmark or shortcut to the URL on the device to access the form when offline. This can be done in one or both of the following ways.
- Bookmark the form’s URL.
- Add a shortcut to your desktop (highlight the form’s URL, then drag and drop it onto your desktop).
Use the Form for Offline Data Capture (After Device Setup)
- Click the form’s saved bookmark on your web browser or open the shortcut from the desktop.
- Enter form data as normal and click Submit when done, or Save Draft to return to finish the form later.
- Submit – Queues records to be submitted automatically. The queue is processed in the background every 5 minutes when the web page is open and an Internet connection is available.
- Save Draft – Stores records within the current browser to allow the user to return to finish later. Drafts data will not be submitted. The user can close this browser without losing the stored record. Draft records can be accessed by reopening the page and clicking the button on the left of the screen.
- The form will either create a new participant or link the form to an existing participant.
- If the form has a Participant ID field and it is populated with an existing Participant’s ID, the system will add the form to the existing participant’s record.
- A new participant will be created if the Participant ID field does not exist on the form or if the data entered in the Participant ID field does not match an existing participant (including if the field is left blank).
- Records are automatically stored and queued in your browser until an Internet connection is available. It is recommended that you keep a tab open for each form until the device is back online and and the queued records are successfully uploaded.

Manage the Queue
- In the upper left corner of the Form webpage, click the number in the white box to open the Queue. This box indicates the number of form records in the queue.
- The form records will display in the queue with drafts indicated by the pencil icon. To edit a draft, click the pencil icon next to the draft you want to edit.
- Queued records (except those marked as draft) are uploaded automatically in the background every 5 minutes when the web page is open and an Internet connection is available. The automatic upload will occur for every open tab even if the window is minimized.
- To manually upload the records prior to the automatic upload, click Upload.
- After a record has been successfully submitted, it will be removed from the queue.
- You can safely close down your browser and device with items in the queue, they will still be there next time you load the form.
- Use the Export option to export the records in a .zip file as a backup on the device.
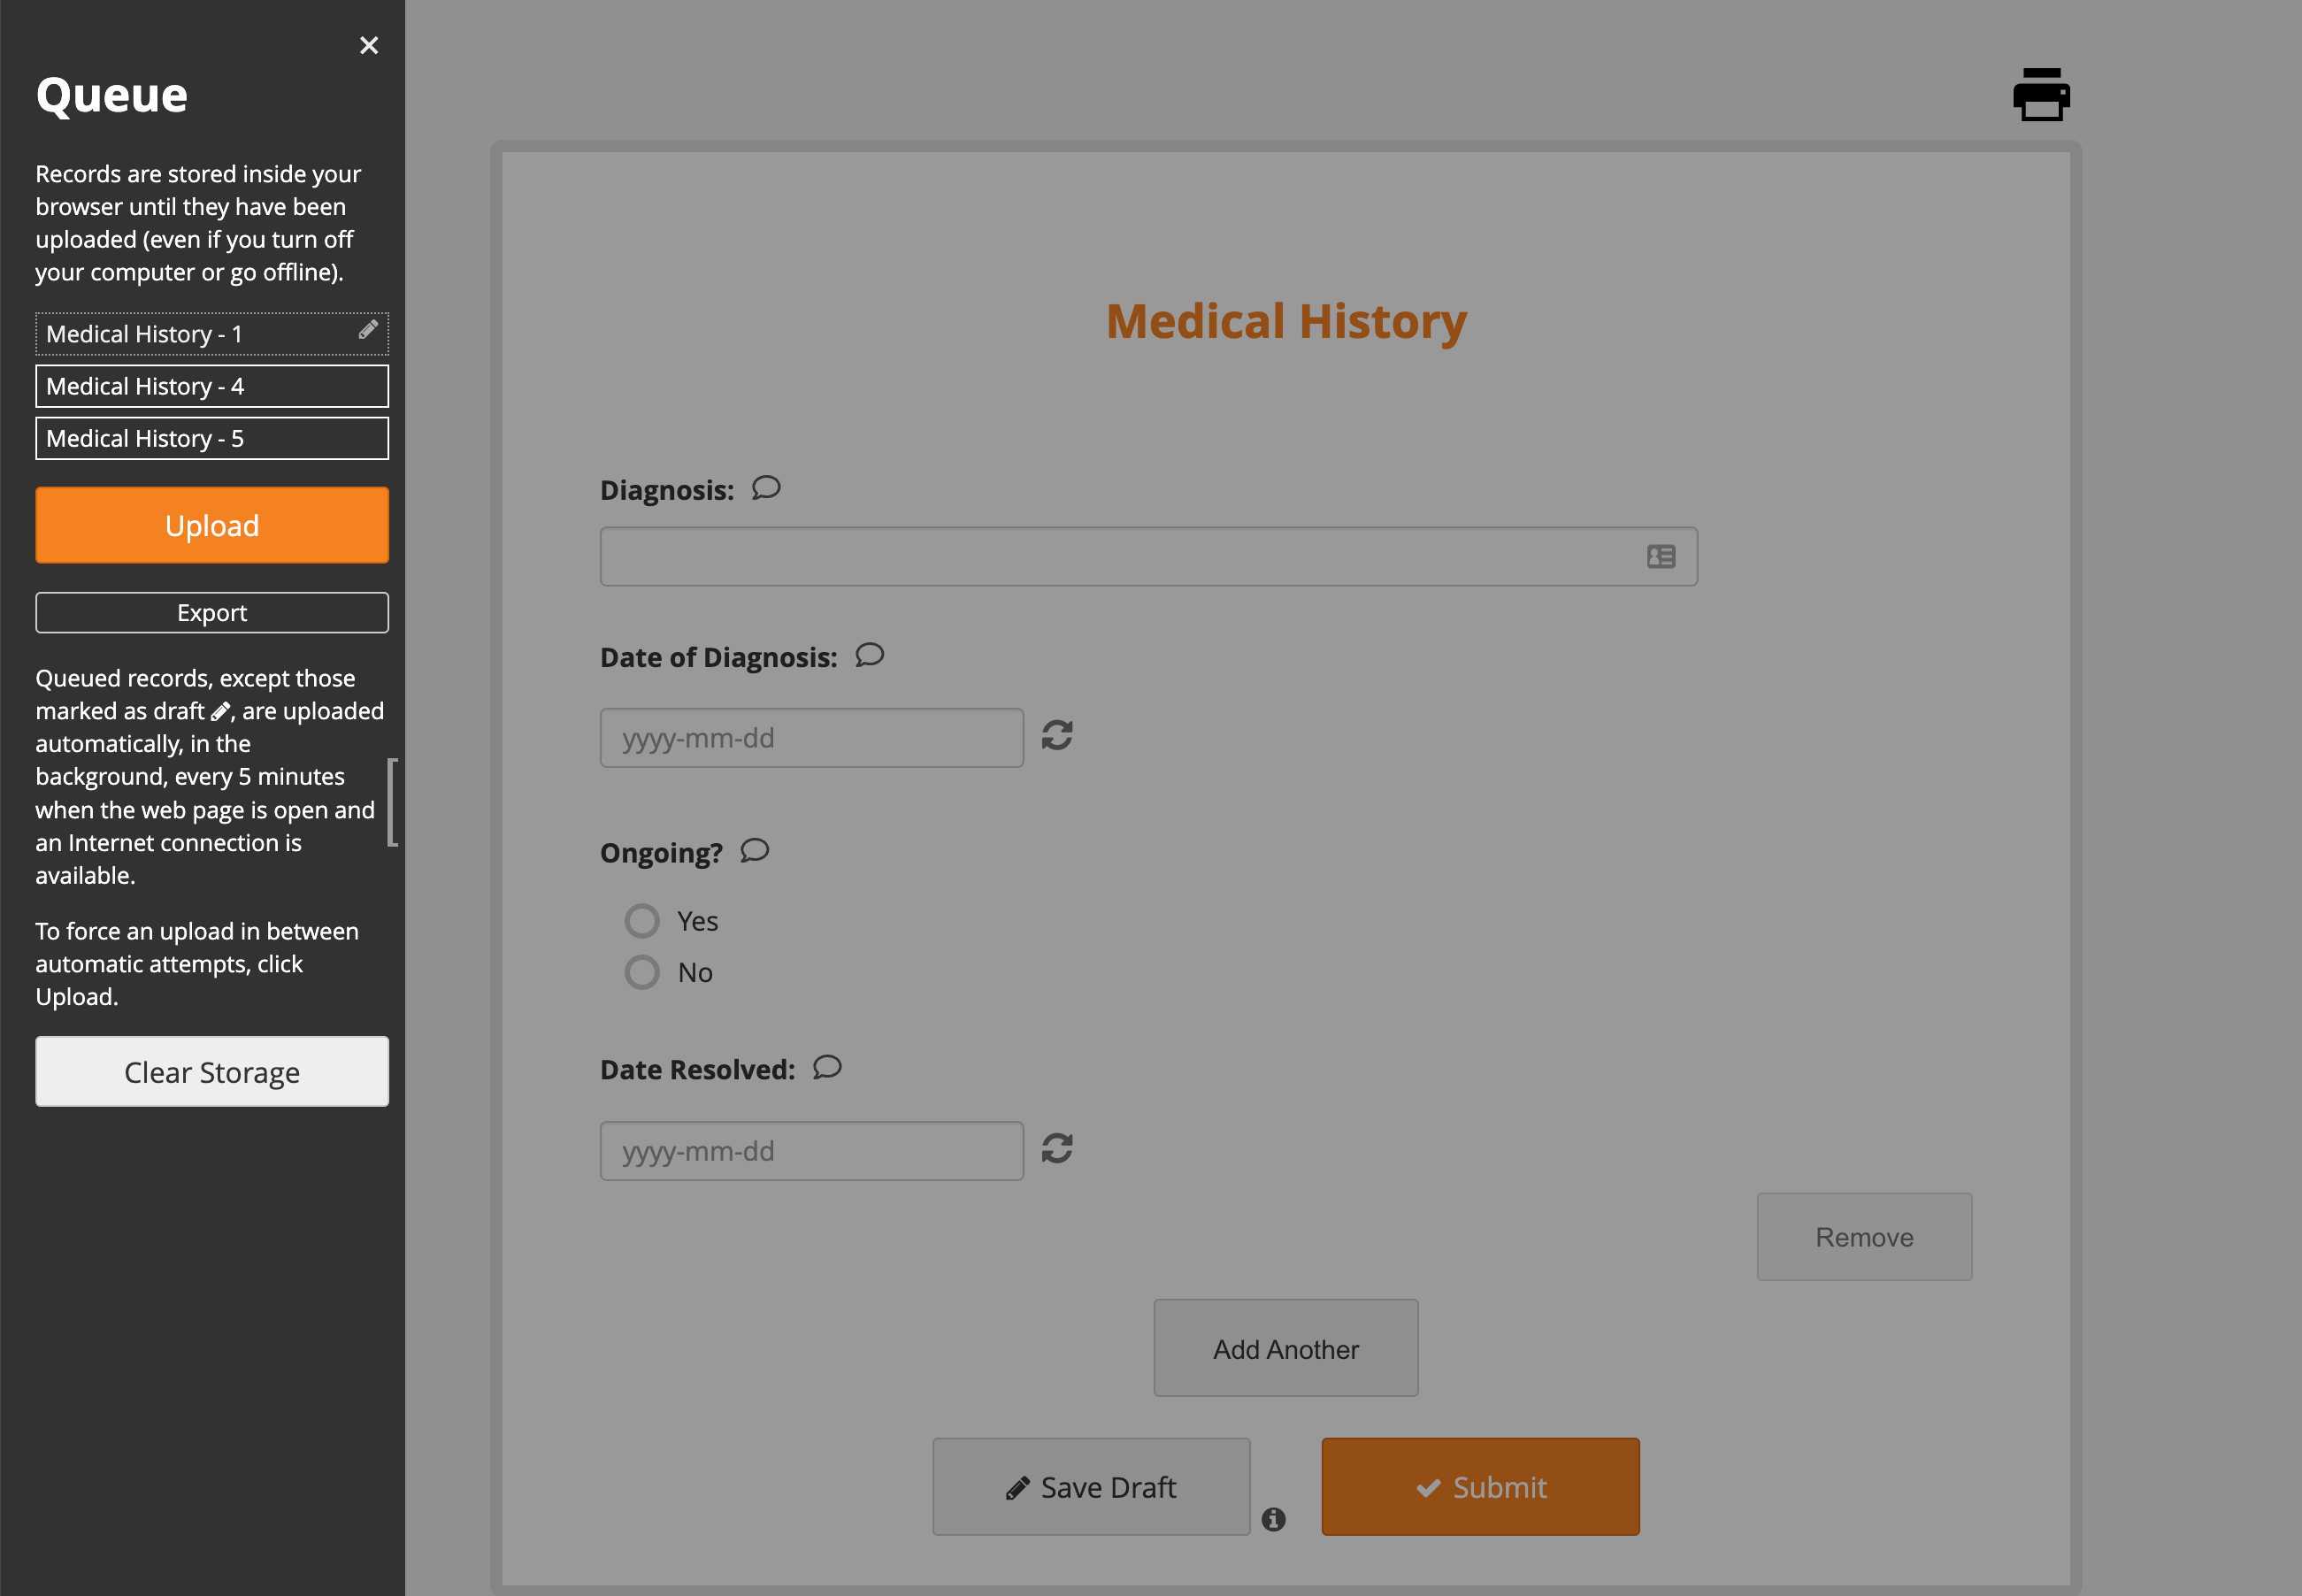
Clear Storage – This will delete all of the queued form records and all of the cached form definitions from the browser storage. The data will be lost forever and the forms will not be usable until you are back online. Use this only if your browser storage seems corrupt.
Similarly, if you clear your browser cache/history, all draft and non-submitted final records will be permanently deleted.