Once the Code module has been activated, you must configure it in Study Designer to indicate which items should be coded. This setup informs the coding module about which verbatim fields in your study should be coded using MedDRA terminology.
ℹ️ Note: The coding table setup in Study Designer is only available if the Code module has been configured.
Navigating to the Coding Tab
- Go to Study Designer: At the top of the screen, click the Design button.
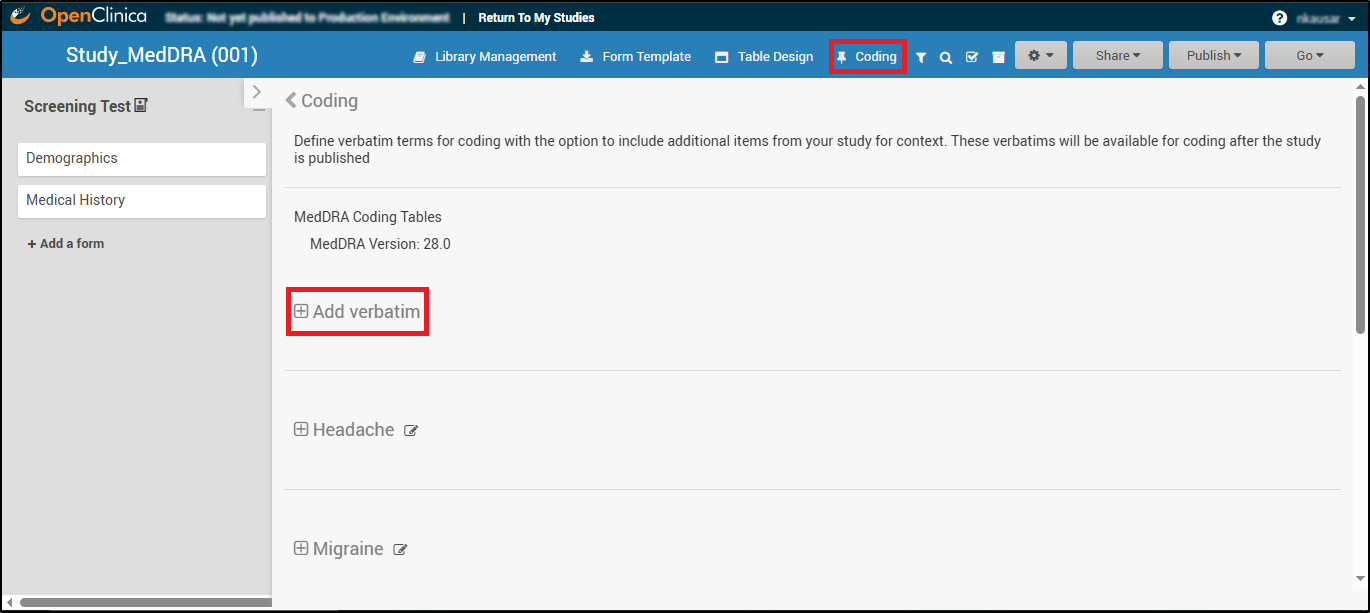
- Navigate to the Coding Design Interface: In the Study Designer workspace, click on the Coding option in the top menu bar.
The Coding tab opens, where you can manage coding settings. Here, you will see the MedDRA Coding Tables section and the option to Add verbatim terms for coding.
Adding and Configuring a Verbatim Table
The following instructions outline the process for setting up a MedDRA Coding Table:
- Click Add Verbatim in the Coding section.
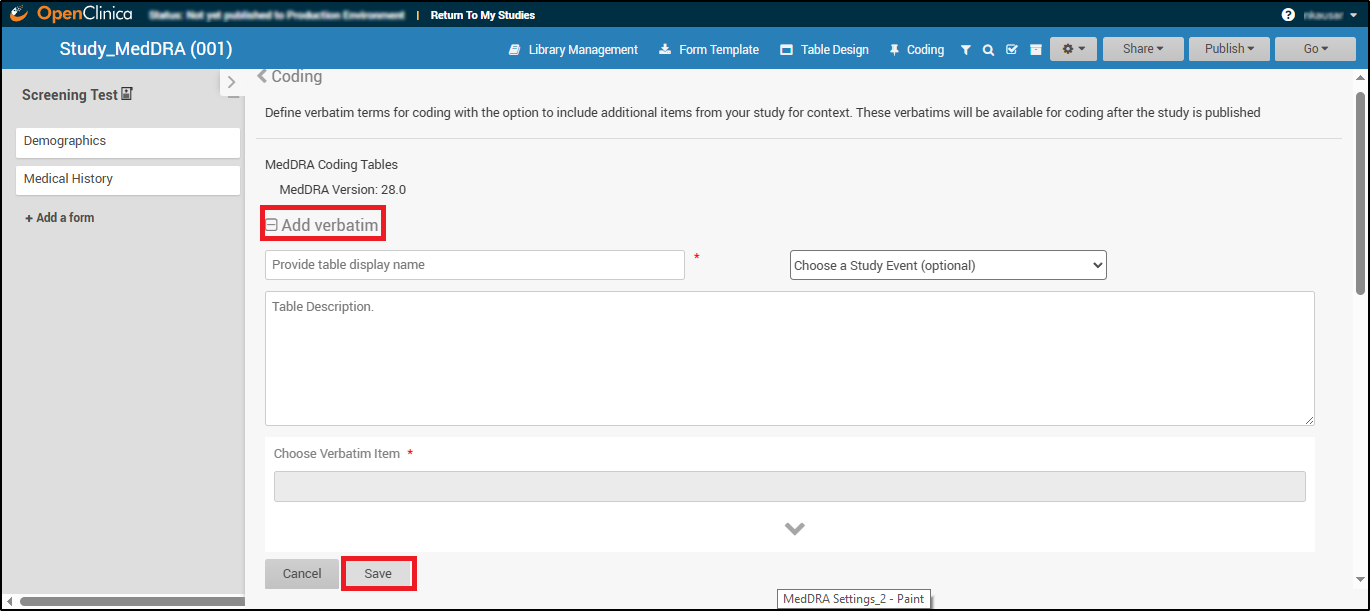
- Provide Table Display Name:
This becomes the header title and Tasks Menu label (e.g., “Adverse Event Coding”) within Study Runner. - Choose a Study Event (Required only if the form is used in multiple events):
If the form containing the verbatim field is used in multiple events, the user must select which event to associate with the coding table. If the form is used in only one event, this selection step is not required.- The verbatim can originate from any form within the study, whether used in visit-based or common events, and from either repeating or non-repeating forms.
- Enter Table Description (Optional):
Add notes or internal guidance for the coding team.
ℹ️ Note: Table descriptions are only visible in Study Designer and do not appear in Study Runner.
- Choose Verbatim Item:
Select the free-text field (e.g., “AE Description”) from your forms that will be coded.
ℹ️ Note: The item selected as the verbatim cannot be part of a repeating item group; the system prevents such selection.
💡 In addition to Adverse Events, coding may also be used for other data types, such as Medical History. If used for this purpose, the Medical History form must be designed without placing the relevant items in repeating item groups.
- Click Save to create the table.
After saving, you can edit:
- Table name
- Table description
- Context items: These context columns provide extra data to the coders but are not the verbatim being coded (e.g., patient date of birth, age, weight, or any data that can be used as a reference for the verbatim).
⚠️ The verbatim itself cannot be edited after saving, as it defines the entire table.
Publishing Coding Tables to Study Environments
Tables and changes only appear in Study Runner once published. Unpublished coding tables will not be available to users entering or reviewing data.
To Publish:
- Click the Publish button at the top right of Study Designer.
- Choose your target environment (Production or Test).
- Click Publish to confirm the changes and make your coding table live.
⚠️ Note: You cannot change the selected verbatim item after publishing (Production or Test) the study. If the verbatim field needs to be changed, Archive the existing table and create a new one.
Archiving
Once a table is archived, it becomes read-only and remains available for export. Archived tables can no longer be modified, regardless of whether they contain coded data or are empty.