Unique Object Identifiers (OIDs) are created for each of the following objects in any given study:
- Study
- Site
- Participant
- Event
- Form
- Item Group (bind::oc:itemgroup as defined in your forms)
- Item
You may need to reference these OIDs in the process of designing your study (such as when using cross-form data in a form definition or when using Web Services).
Find Your OIDs:
There are three options for locating OIDs in OpenClinica. You can use the Data Dictionary in Study Designer, use the OpenClinica interface to drill down through each object, or download the study metadata and locate the OIDs within the XML metadata.
Using the Data Dictionary in Study Designer:
The Data Dictionary gives you form-specific information including form metadata, form properties, and item metadata (such as Item OID, Item Group Name, Item Group OID, Item Type, and Insight Table). The Data Dictionary is available via a link on each form card in Study Designer and can be downloaded as a CSV file to view outside of Study Designer.
- Open the form in Study Designer and click the Data Dictionary link.
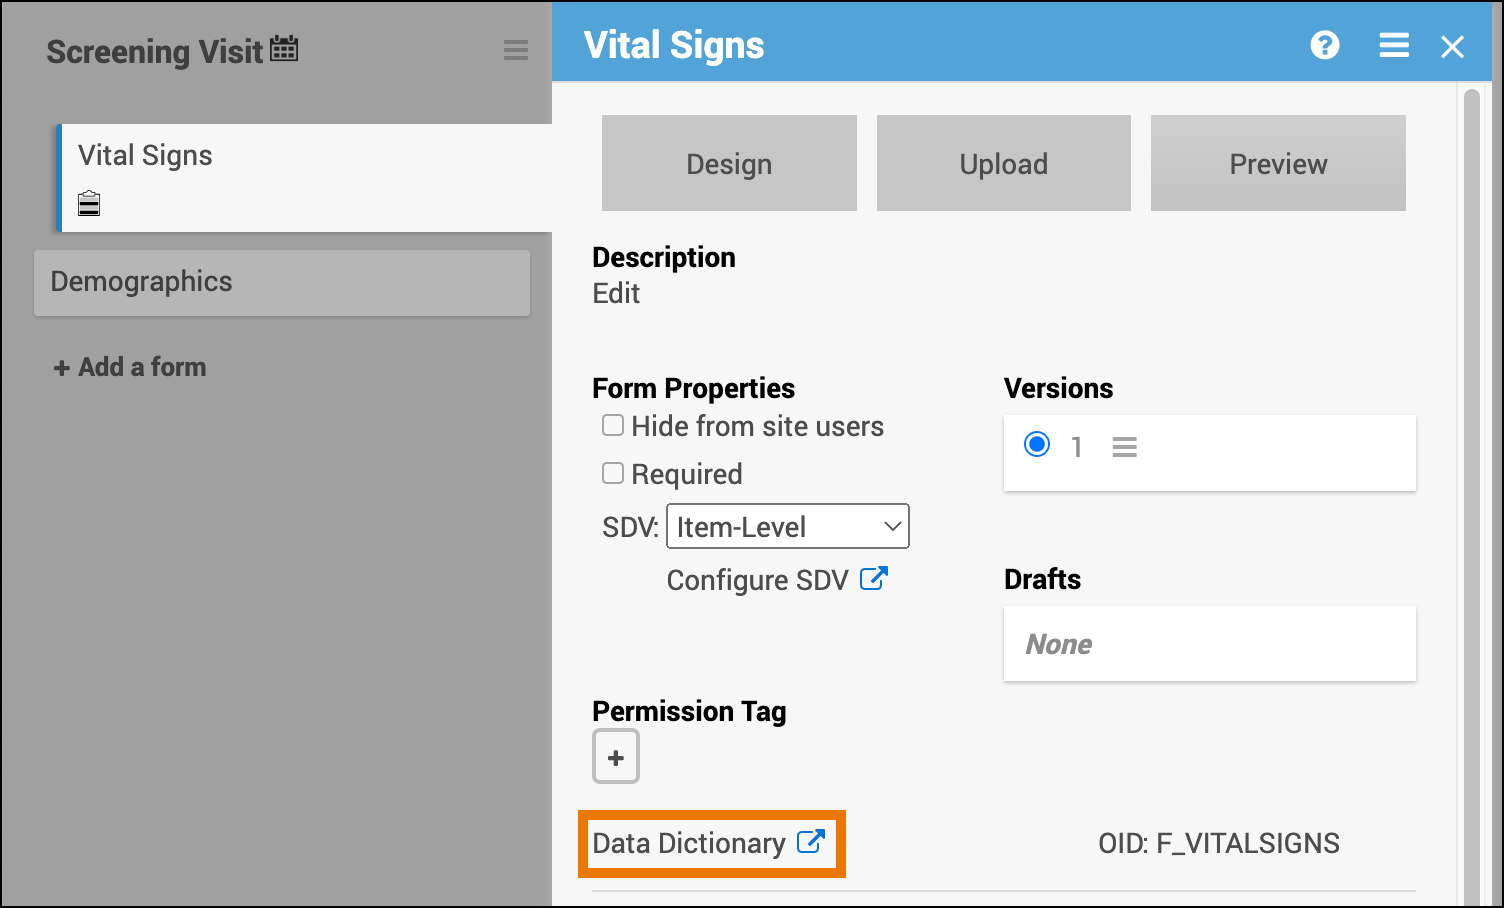
- Review and/or copy the information you need from this window, or click the Download icon to download the CSV file.
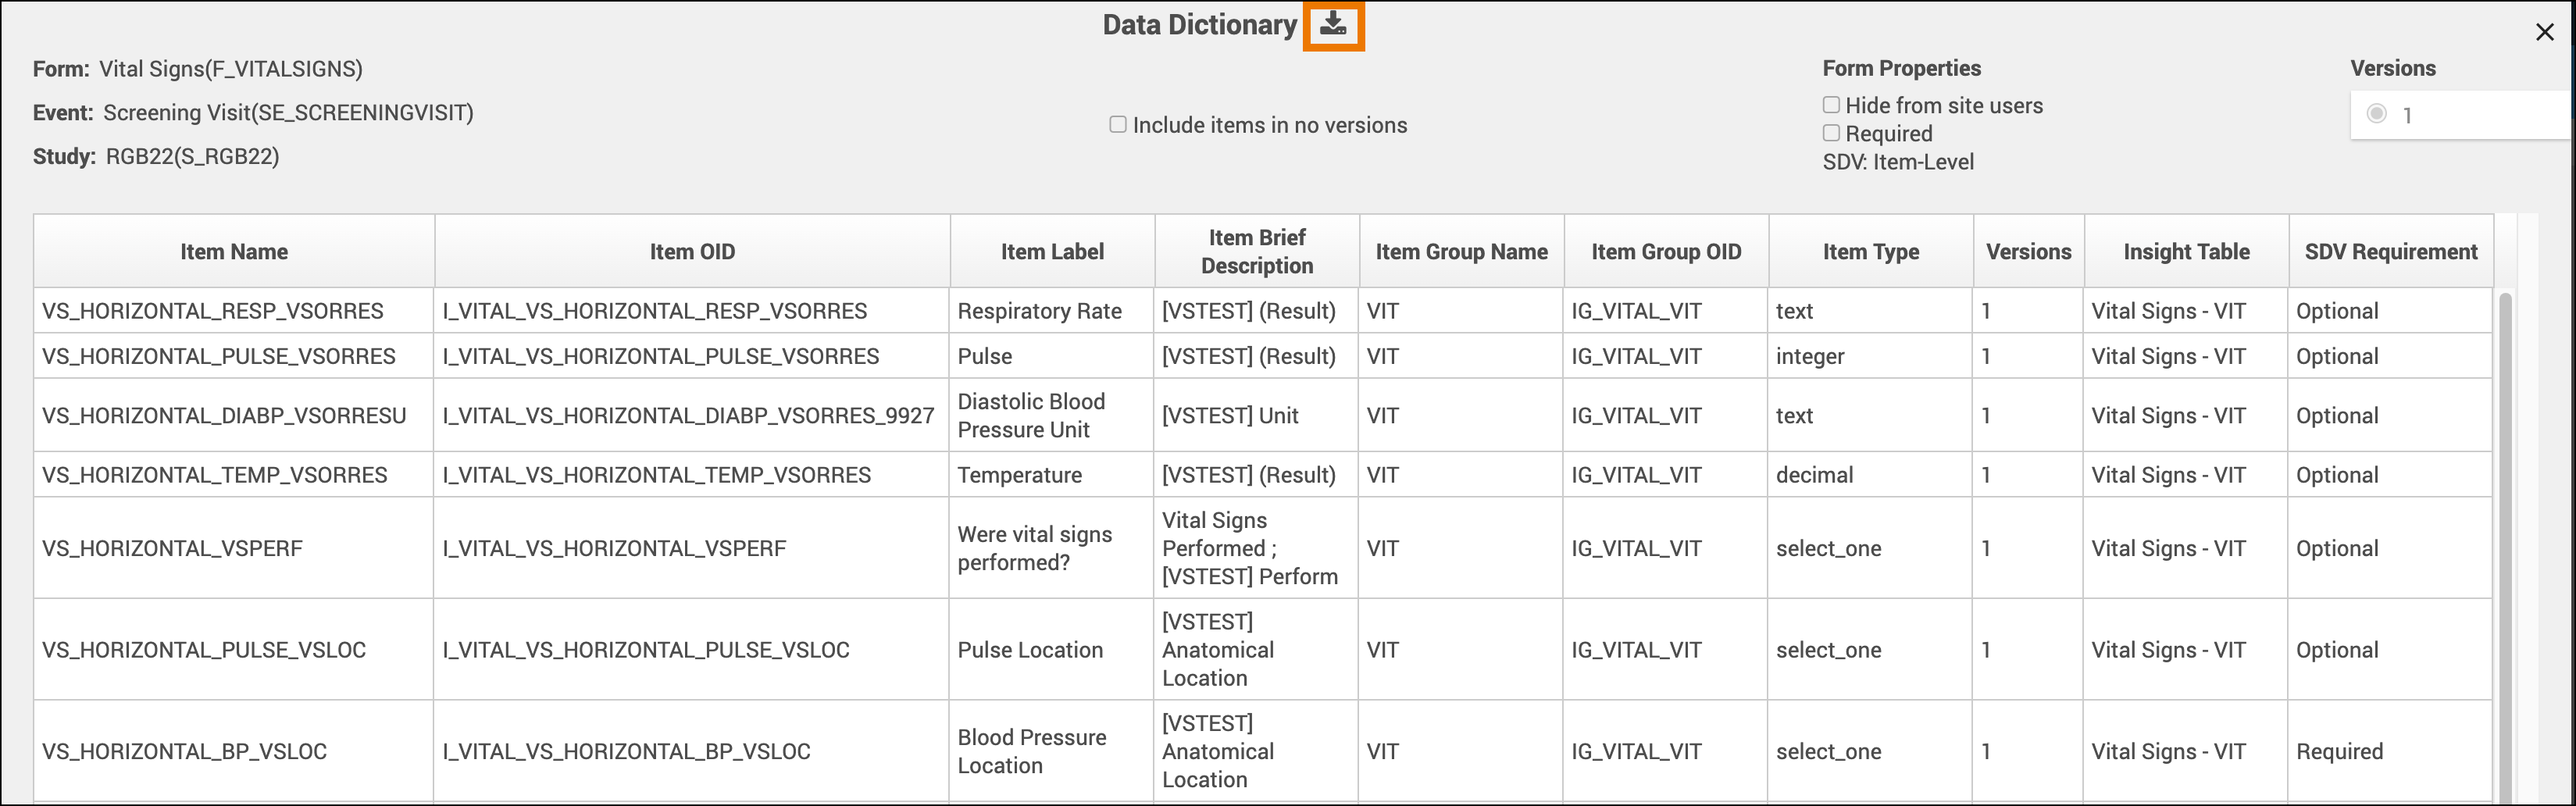
Note: Uploading the same version of a form multiple times can lead to some removed items not being present on any form version. These items with no versions are filtered out of the Data Dictionary by default but can be shown by selecting the Include items in no versions checkbox.
Using the OpenClinica Interface:
- Go to your study in either the Test or Production environment by using the Go menu (Study and Site OIDs will end in TEST or PROD depending on which environment you choose).
- Select Tasks ⇨ View Study or click on your study name in the upper left corner of the title bar.
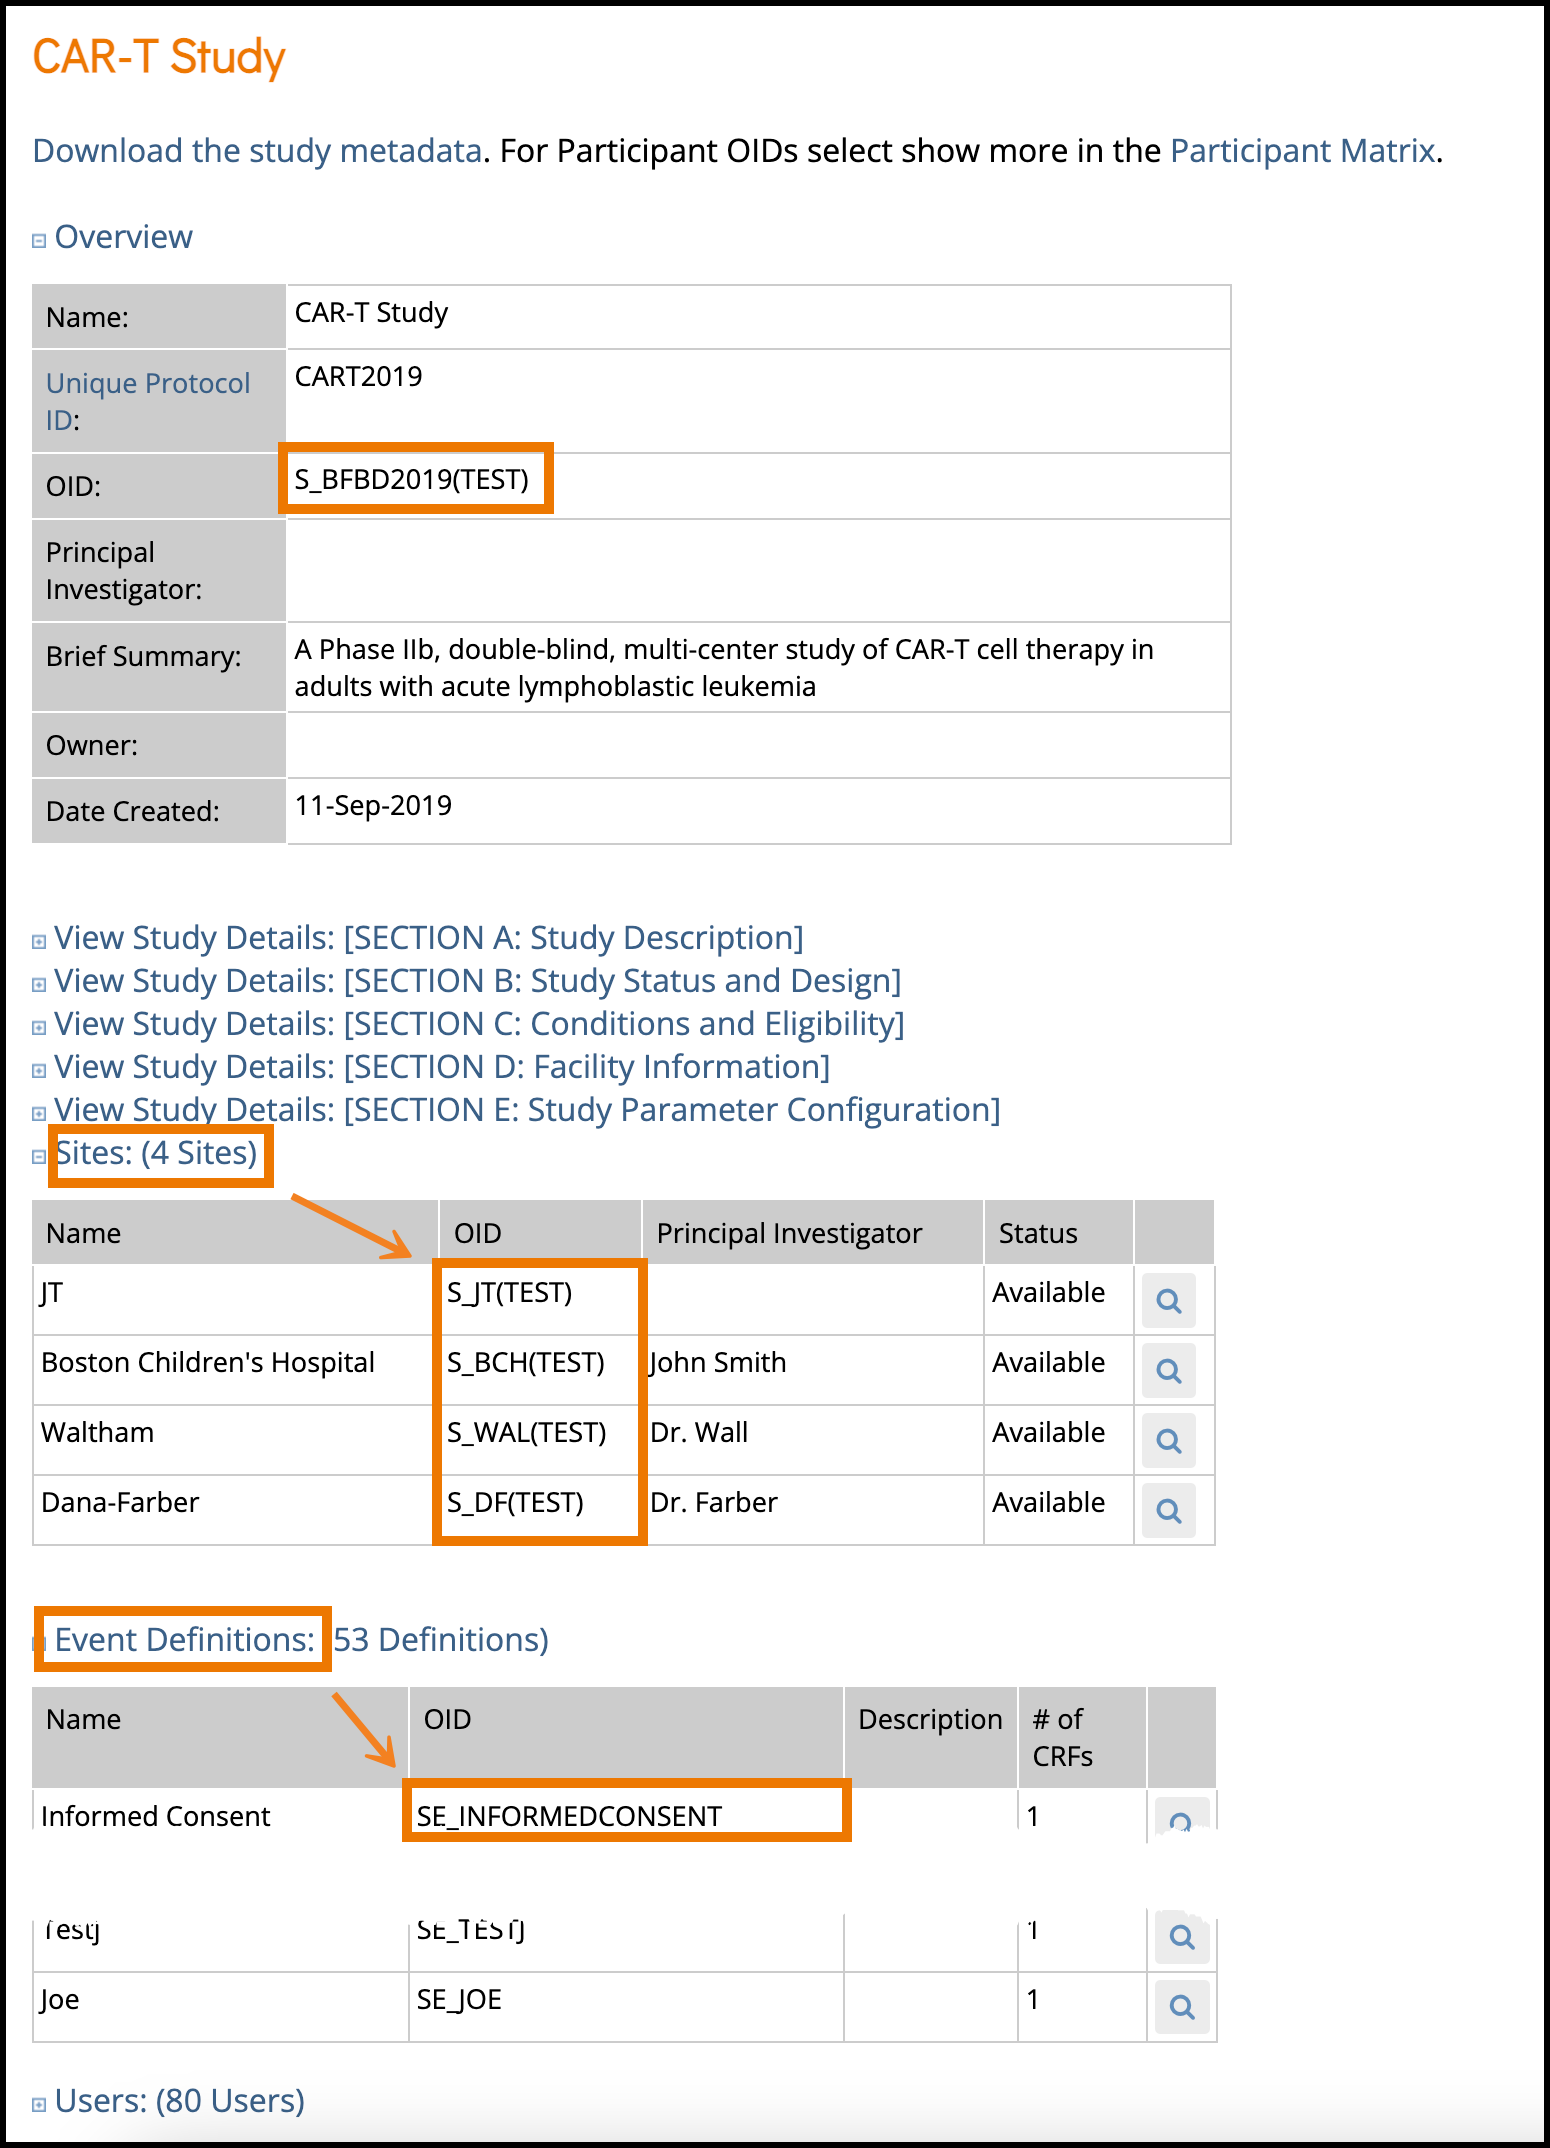
- The Overview section of the study details page displays the study’s OID.
- S_BFBD2019(TEST) in the case shown.
- The Sites section of the study details page shows the Site OID(s).
- In the example above:
- S_JT(TEST)
- S_BCH for Boston Children’s Hospital
- S_DF for Dana-Farber
- S_WAL for Waltham
- In the example above:
- In the Event Definitions section, each event will have its corresponding OID.
- SE_INFORMEDCONSENT as highlighted above in this example.
- To access the CRF OIDs, you will need to open the event definition. Click the View icon for the event you’re interested in. This will open the event definition screen as shown below.
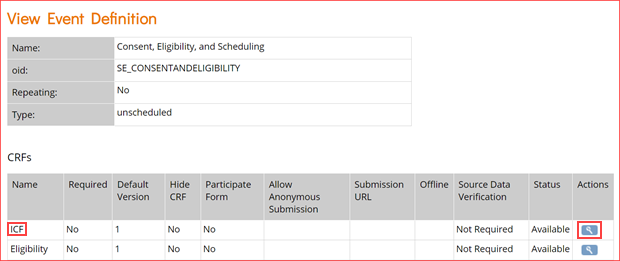
- In the CRFs table, click the view icon for the CRF whose OIDs you want as highlighted in the image above for the first event.
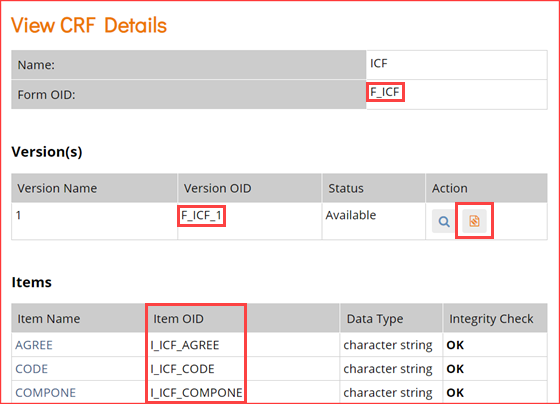
- In the View CRF Details table (above), record the OID for the Form.
- Clicking the icon highlighted in the Actions column above will access the page for the CRF.
- For the CRF version you want, click the metadata icon (Item name link).
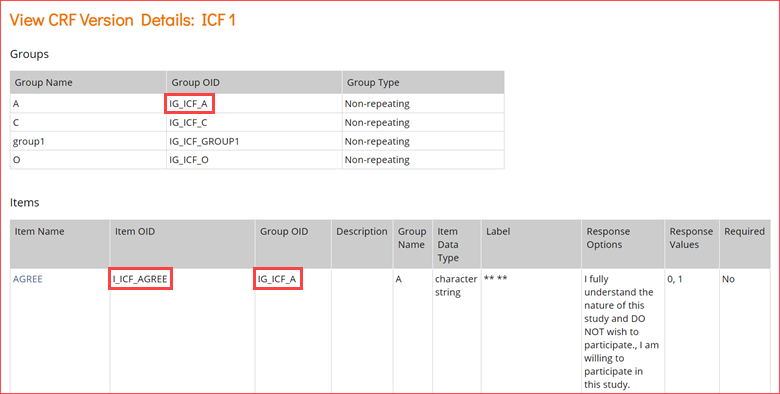
- In the View CRF Version Details page, record the OIDs for the Group(s) and Item(s) (in that order).
Study XML File:
You can locate OIDs directly in the Study XML metadata file.
- On the Study Details screen, click the Download the study metadata link.
- Open the Study metadata file in a browser or text editor.

- Scroll through the file to locate the OIDs.
- Continue to scroll through the metadata or collapse sections as needed to locate the Item Group and Item OIDs.