Administrators manage settings, users, roles, sites, modules, and publishing for all studies within the OpenClinica domain.
They can also assign Study Designer and Study Runner roles to themselves or other users for any study.
⚠️Warning: Administrator access should be granted to a limited number of users within your organization.
For more information on manage settings, users, roles, sites, modules, refer to Study Settings, User Roles, Modules.
Administrator Capabilities
Administrators are the only user type with access to the following actions:
- Create a study
- Perform Central User Administration
- Access User and Role Audit Logs
- Access the Web Services (Swagger) Interface
Study-Specific User Administration
Users with the Data Manager role in the Test or Production environments can manage user accounts for studies in those environments.
To Manage Users for a Study
- Go to the My Studies screen.
- Click the Share button below the study you want to manage.
- You can also access the Share button from Study Designer or Settings.
- On the User Administration / Share screen, click:
- Invite
- Edit
- Remove
- Resend Invitation
💡 Tip: Use the Resend Invitation option if a user accidentally deletes or misses their original invitation email.

Central User Administration
Only Administrators can access the Administration screen, available from the User Menu (upper-right corner).
From this screen, Administrators can edit, deactivate, or reactivate accounts across all studies and environments.
ℹ️ Note: OpenClinica Team users are hidden by default.
To view them, select the Show OpenClinica Team Users checkbox.

Searching for Users
- From the User Menu, select Administration.
- Enter a First Name, Last Name, Username, or Email in the search box.
- Click Find.
- To clear your search and display all users, click Reset Search.
⚠️ Warning: Search results show a maximum of 10 users per page.
If your search returns too many or too few results, refine your criteria. Sorting is not available when search filters are applied.
Editing User Accounts
- From the User Menu, select Administration.
- On the Administration screen, click Edit next to the user account you want to update.
- Update the required fields (you cannot change the username).
- Click Save.
Activating or Deactivating User Accounts
- From the User Menu, select Administration.
- On the Administration screen:
- Click Deactivate to disable a user account. The user will no longer be able to log in.
- Click Activate to reactivate a deactivated account across all studies and environments.
Possible User Statuses
| Status | Description |
| Created | The User account has been created but no roles have been assigned. |
| Invited | The user account has been created, and at least one role assigned, but the user has not yet activated the account. |
| Available | The user account is active and available for use. |
| Deactivated | The user account has been removed. The user can no longer log into OpenClinica. |
ℹ️ Note: User accounts cannot be deleted.
Downloading the Qualification Report
The Qualification Report includes details on the system configuration and is updated for each OpenClinica release.
To Download the Qualification Report
- From the User Menu, select Administration.
- Click Download Qualification Report.
The latest qualification report is downloaded automatically in your browser.

User and Role Audit Log
Study Administrators can download the User and Role Audit Log from the Administration screen.
This log records all user- and role-related actions in the study, including account activity, authentication via Single Sign-On (SSO), event type, timestamp, and the user associated with each change.
To Download the User and Role Audit Log
- From the User Menu, select Administration.
- Click Download User and Role Audit Log.
- The User and Role Audit Log modal opens.
- In the modal window, the Start Date and End Date fields are required. Both fields display in DD-MMM-YYYY format and can be entered manually or selected from the calendar.
- By default, the Start Date is set to today’s date minus 30 days (UTC).
- The End Date defaults to today’s date (UTC).
- You can adjust these fields to select a custom range of up to 368 days (approximately one year).
- Click Download to download the audit log file.
ℹ️ Notes:
- Dates are based on the UTC time zone, which may differ from your local time. Confirm that your selected dates align with UTC to ensure all expected records are included.
- If an error occurs—for example, if the selected date range exceeds one year—an error message appears directly below the title and subtitle. Adjust the date range as needed and click Download again.
The system downloads an .XLS file containing detailed records of user and role activity,
The downloaded file (.XLS) contains:
- Event type
- Date and time (UTC)
- Associated user
- User who made the change
- Details of the change
The log file includes all entries from the selected Start Date through the End Date (inclusive) and excludes any entries outside that range.

Events Included in the Log
- Successful Logins/Logouts
- Failed Logins
- Password Changes
- User Role Changes
- Role definition edits (old vs. new values)
- User profile edits (old vs. new values)
For information on audit logs related to participant data, refer to Participant Audit Log.
Web Services (Swagger Interface)
OpenClinica Web Services provide RESTful APIs that enable data exchange and bulk operations between systems.
For background information on RESTful APIs, see RESTful APIs.
The Swagger UI, available from the Administration menu, allows developers to view API documentation and interact with endpoints directly.
Access the Web Services Swagger UI
- From the User Menu, select Administration.
- Click Web Services Information.
- Click an API name to open its documentation.
Web Services Capabilities
You can use Web Services to:
- Retrieve clinical data in JSON, XML, or PDF formats
- Import clinical data in XML format
- Retrieve participant data and IDs
- Add one or more participants at the study or site level
- Add new sites
Use the Swagger UI
- Click Try it out.
- Complete the required fields.
- Click Execute.
ℹ️ Note: Some APIs require Object Identifiers (OIDs) specific to your study.
OIDs are unique identifiers automatically generated for each object you create, such as studies, sites, events, forms, item groups, items, and participants. For details on finding OIDs for your study, see Locating Object Identifiers.
For more information on Web Services, refer to OpenClinica 4 Technical Documentation.
For more information on the Swagger UI, refer to Swagger.
For more information on APIs, refer to How and When to Use APIs.
⚠️ Important
When you use Try it out, API calls are executed in the target environment based on the study OID you provide and your assigned study role.
APIs can add or update study data, so use extreme caution when working in a Production environment.
The Responses section shows the outcome of the operation.
If any errors occur, a descriptive message appears in the results.
Bulk Actions Log
The Bulk Actions Log tracks the progress and outcomes of bulk operations performed in Study Runner.
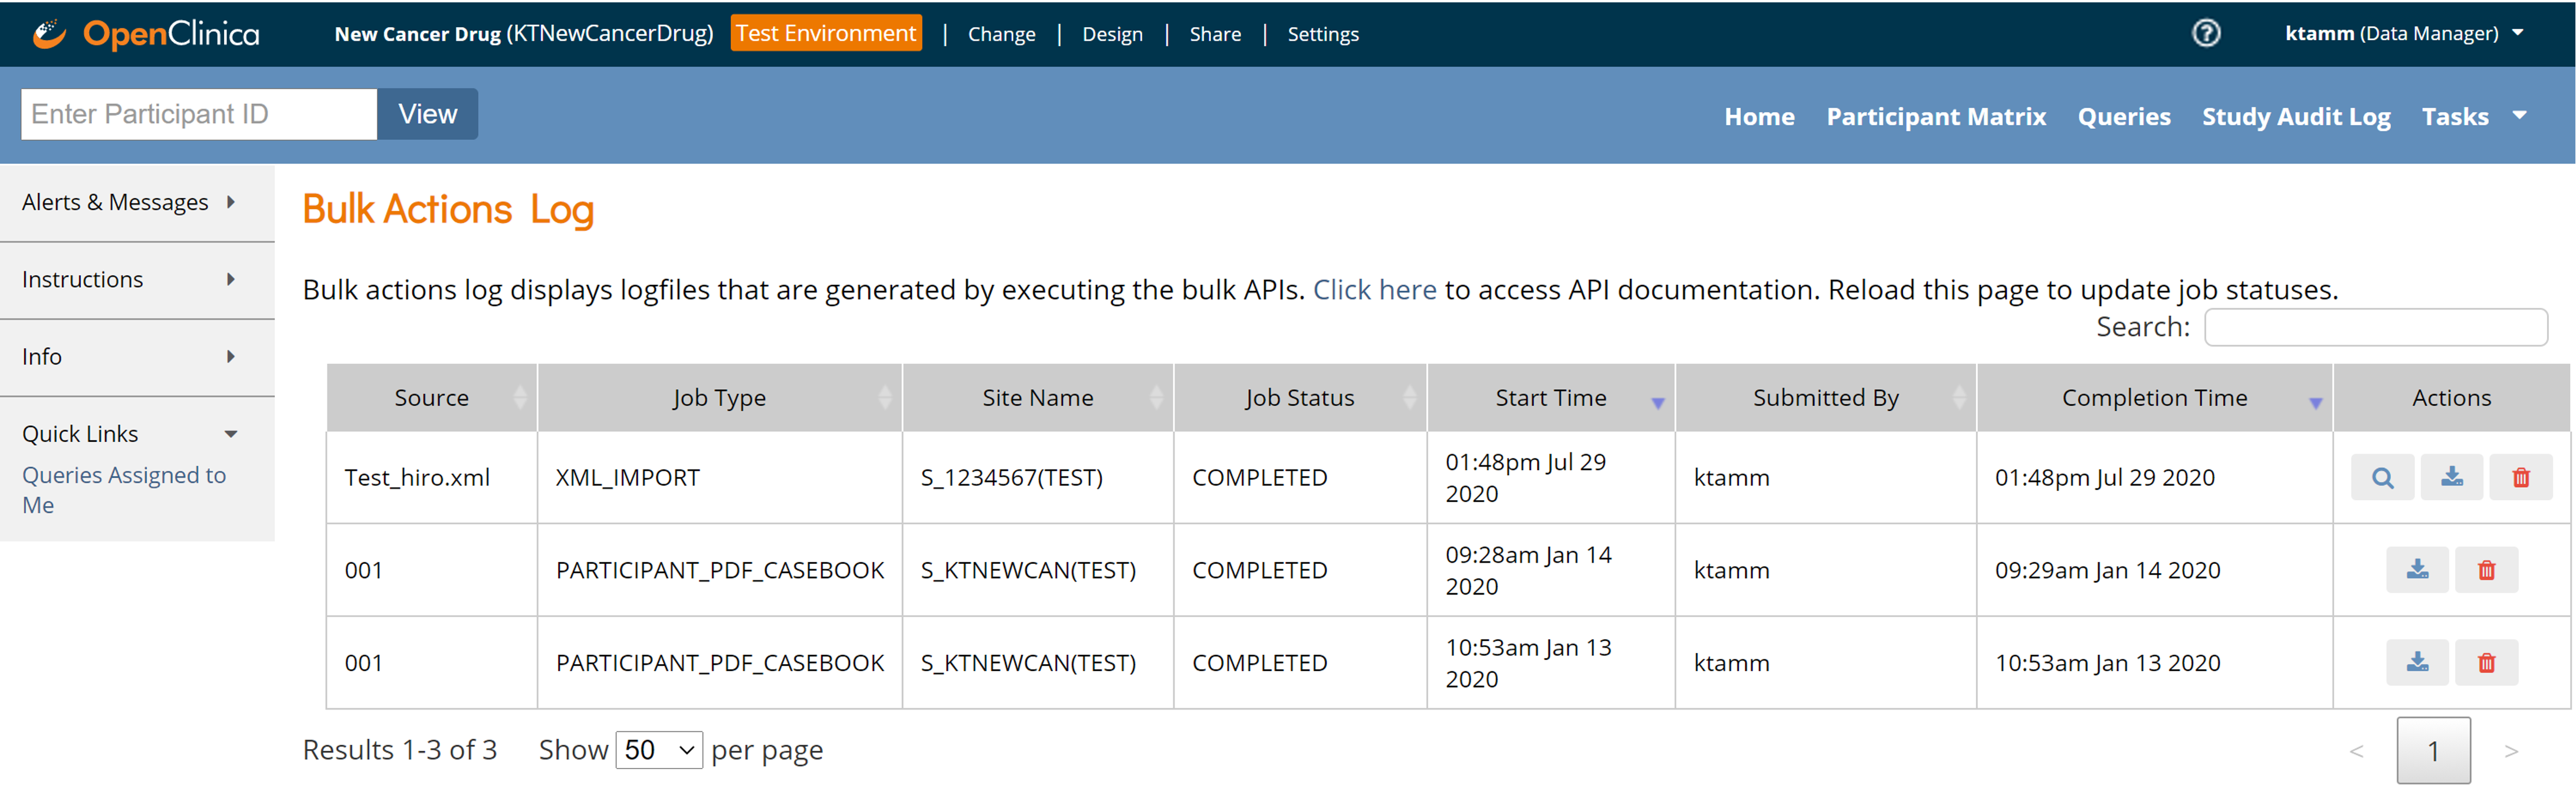
To View the Bulk Actions Log
- Click Tasks in the navigation menu.
- Select Bulk Actions Log.
The log displays:
- Source file name
- Job type
- Site name
- Status and completion time
Once an action is complete, you can View, Download, or Delete the log entry.