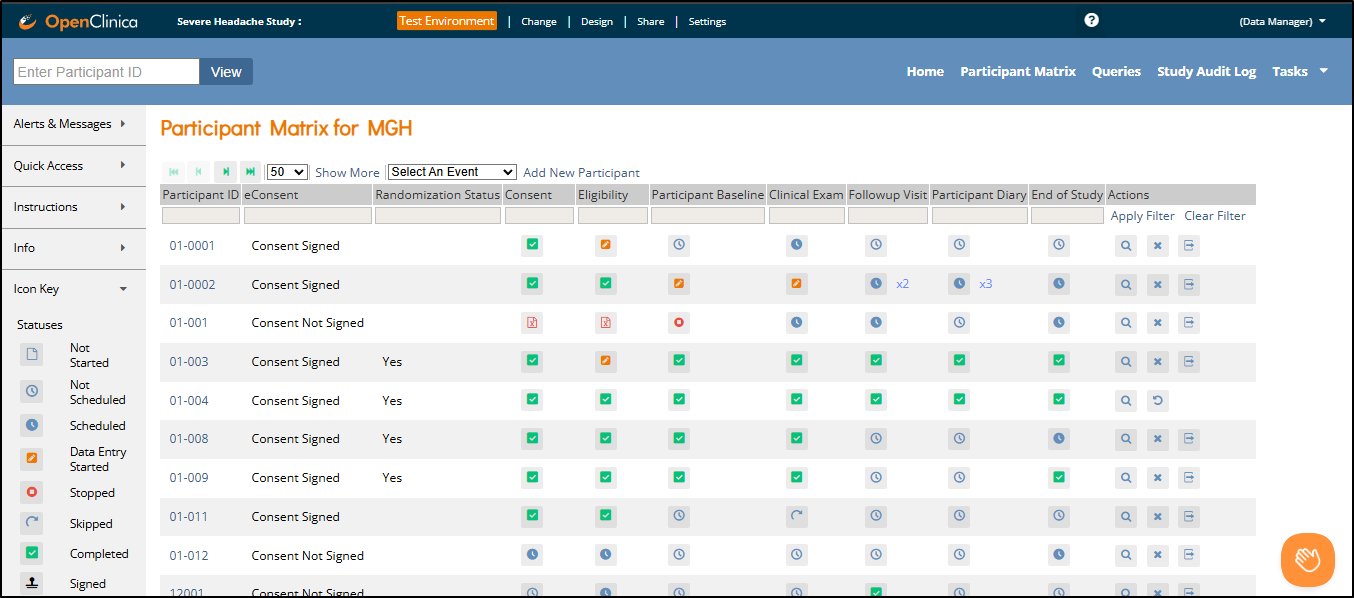
The Participant Matrix provides a centralized view of participants enrolled in your study or site. It helps you track participant status, identify records that require action, and navigate directly to related tasks.
If accessed at the study level, the Participant Matrix displays all participants in the study.
If accessed at the site level, it displays only participants at your assigned site.
There are two main views:
All Events View – Columns represent visit-based events (e.g., Screening, Baseline, Follow-up)
Single Event View – Columns represent forms within the selected event
Each row in either view represents a participant. You can hover over icons to see more details about event or form status. A legend appears on the left side of the screen as a quick reference for icon meanings.
ℹ️ Note: For more information, refer to Status Icons.
Common Actions
You can use the Participant Matrix to:
Manage Participants:
- Add a participant (For more information, refer to Adding a Participant)
- Edit participant data
- Remove a participant
- Restore a participant
- Sign a participant record (Investigators and data specialists only. For more information, refer to Signing Participant Records.)
- Reassign a participant to another site (data managers only)
Manage Events and Forms:
- Schedule events
- View participant details
- View, enter, or edit forms (depending on access)
ℹ️ Note: For more information on actions that can be completed in the Participant Matrix, refer to Action Icons.
Matrix Layout
- In All Events View, the columns are the visit-based events defined in your study design.
- In Single Event View, the columns are the forms within the selected visit-based event.
- Common Events are not displayed in the matrix.
- The eConsent Status column appears if the Consent module is enabled and configured.
- Additional custom columns may be configured in the Study Designer. For more information on configuring Custom Column Headers, refer to Defining Custom Column Headers on the Participant Matrix and Queries Table within Design a Study.
Filtering Participants
You can filter participants using:
- The Select an Event dropdown at the top of the matrix
- Gray filter boxes under each column header
- Participant ID: Type partial or full ID
- Visit-Based Event Columns: Filter by status
- ℹ️ Note: If you filter Events with a status of Not Started, the Participant Matrix only includes Events that were previously started and then deleted, i.e. Events that have never been started are excluded.
- Custom Columns: Filter options vary by data type
- Status Column: (Visible when Show More is enabled) – View participants by overall status: Available, Removed, Signed, etc.
