Definition:
Potential Uses:
User Roles:
|
Data Review Tables are first created and configured within Study Designer by a Data Manager. After the table is configured and the study is published, the table can be accessed from the Tasks menu in Study Runner.
Create a Data Review Table:
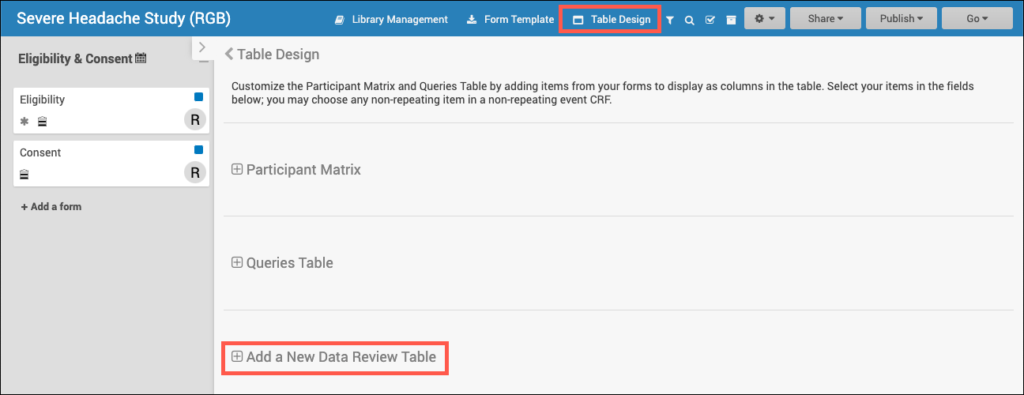
- Within Study Designer, click Table Design, then select the + Add a New Data Review Table link.
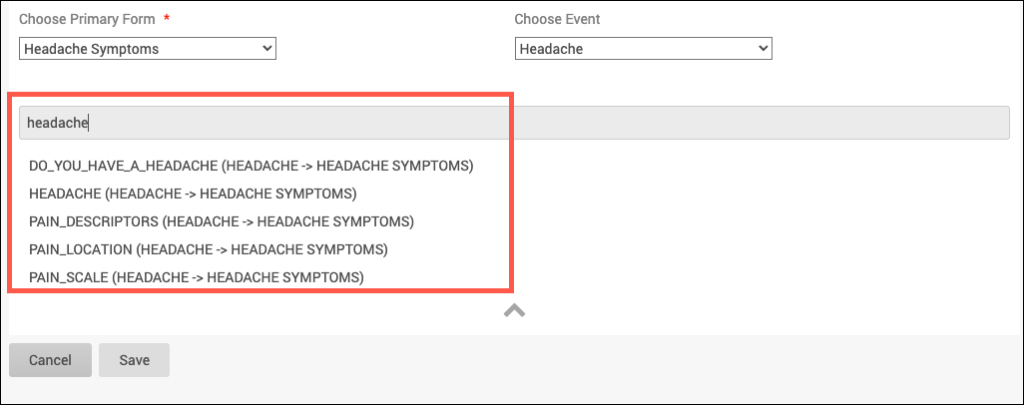
2. Add the table details including the table name and description (optional). Then select the primary form (and optional event) to use.
a. The Primary form is the form on which your table is based. Information based off of the Primary form will be displayed in the default columns on the table (Event Start Date, Form Status, Event Name, Event Status, Form Last Modified By, and Form Last Modified Date). The Primary form is the form which is removed when you click Remove Forms (the forms with additional items displaying on the table will retain their status).
b. Many forms are used for multiple events (Vital Signs can be used for the Baseline, Follow Up, and Treatment events). When an event is selected for the form, this means that only forms within the selected event will display.

3. Click into the grey box and select which items to display in the table. Only items that can be added to the table will be displayed. This list includes all items from the chosen form that are not in a repeating group, and all items from forms in non-repeating events that are not in repeating groups. Items in archived forms or archived events as well as items in repeating groups will not be able to be selected.
a. The items in the dropdown will be listed as a string in the form of “ItemName (EventName -> FormName)” and will be displayed in alphabetical order based on that string.
b. Type a key word in the grey box and press Enter to filter the list.
4. If needed, drag and drop the selected items to rearrange the order in which the corresponding table columns will appear, then click Save.
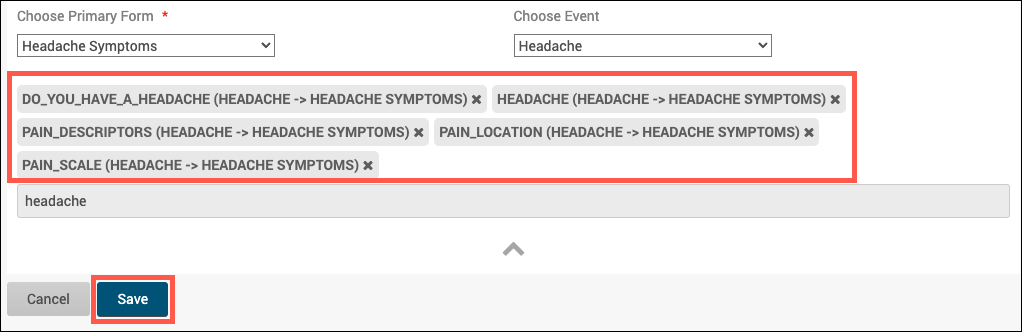
a. After the table is saved, Publish the study to see the table within Study Runner.
Note: If you edit a review table that has Archived items in it, the items will remain in the table (unless manually removed from the table) and the table can still be resaved. However, if the Archived items are removed from the table, these items cannot be added back.
Use the Data Review Tables page for information on accessing and using Data Review Tables within Study Runner.