A good way to familiarize yourself with a defined CRF is to look at its existing CRF .xls file and at the way OpenClinica presents it in the web interface:
- Click here to download a sample CRF defined for a Physical Examination, SAMPLE_PHYSICALEXAM_ENGLISH.xls. Save the file to your computer.
- Upload the defined CRF to your OpenClinica system.
- Set the current Study to the Study level.
- From the Tasks menu, in the Monitor and Manage Data module, select CRFs.
The Manage Case Report Forms page opens. - Click Create a New CRF.
The Create a New Case Report Form page opens. - In the MS Excel File to Upload field, click Browse, then navigate to the file you downloaded in step 1, SAMPLE_PHYSICALEXAM_ENGLISH.xls. Select the file, then click Open.
The path to the filename is shown in the MS Excel File to Upload field. - Click Preview CRF Version.
The Check CRF Version Data page opens, showing the CRF in the web interface format. - Click Continue.
The Create a New CRF Version – Data Committed Successfully page opens.
- View the defined CRF in OpenClinica:
- From the Tasks menu, in the Monitor and Manage Data module, select CRFs.
The Manage Case Report Forms page opens. - For Sample Physical Exam – English Version, click the View icon.
The defined CRF displays in the web interface format.
- From the Tasks menu, in the Monitor and Manage Data module, select CRFs.
- In Excel, open the CRF file you downloaded, SAMPLE_PHYSICALEXAM_ENGLISH.xls.
- Compare the CRF when viewed in the web interface format to the defined CRF when opened in Excel.
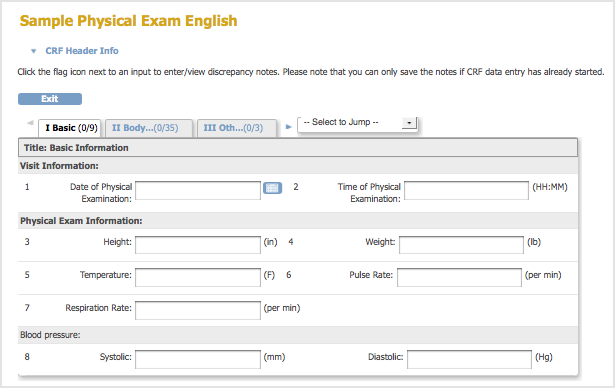
A Sample Defined CRF when Viewed in the Web Interface:
Note that when the CRF is previewed after upload, or viewed through ‘Manage CRFs’, any hidden fields in the CRF are visible.
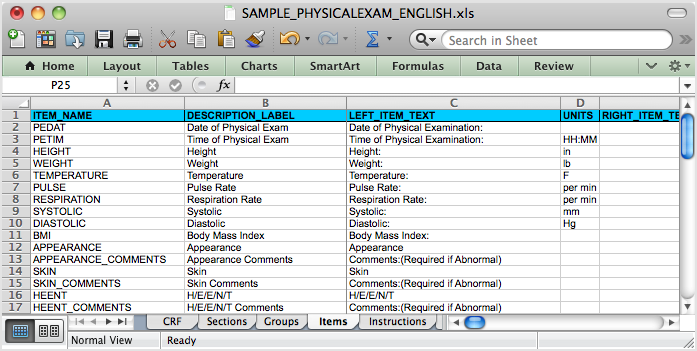
The Same CRF when Opened in Excel, Showing the Items Tab: