Definitions: An Event is a group of forms that are used in your study. An event might or might not be connected to a real-world visit. A Form or eCRF (electronic Case Report From) is a group of fields for collecting participant data. |
Examples: An Event could be a follow-up visit that occurs during a study. A Form could be used to record a participant’s vital signs, capture a patient’s informed consent, track drug accountability, etc. Study Designer contains a set of features that allow you to define, configure, and manage events for your study. |
Events
Each event can be defined as one of the following types:
- Visit-Based: An event that is scheduled to occur within the study and is associated with a visit date.
- Common: An event that isn’t necessarily associated with a visit but may occur any time throughout the study.
In a typical clinical trial, most events are defined as Visit-Based events, such as: Week 2, Week 6, and Monthly Follow-up, in which the Week 2 visit occurs two weeks after the Baseline visit, the Week 6 visit occurs six weeks after Baseline, etc. These visits are associated with a schedule that is outlined in the study protocol, and each visit has a specific set of forms that are collected.
Common events are used to collect information that is not necessarily related to a scheduled visit date. For example, Adverse Event (AE), Concomitant Medication (ConMed), or Early Termination events.
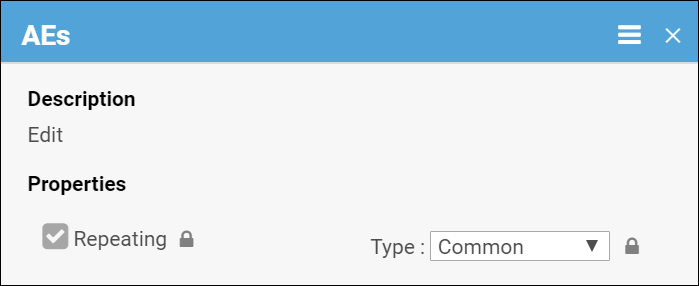
Common events can be defined as either Repeating Events (e.g. AEs and ConMeds, since participants might have more than one AE or ConMed) or Non-Repeating Events (e.g. Early Termination, because a participant can only terminate once).
Event Icons
In Study Designer, one or multiple icons appear after the name of the event.
| Icon | Event Type | Description | Example(s) |
 | Visit | An event that is associated with a visit date. The event can be repeating or non-repeating. | Week 2 Visit (non-repeating); Monthly Follow-Up for Disease-Free Survival (repeating) |
 | Common | An event that is not necessarily associated with a visit date. | Early Withdrawal or Termination (non-repeating); Adverse Events (repeating) |
 | Repeating | An event that repeats in your study, either a known or unknown, number of times. This icon will appear adjacent to one of the previous two when an event is a repeating event. | Concomitant Medications |
Add an Event to a Study:
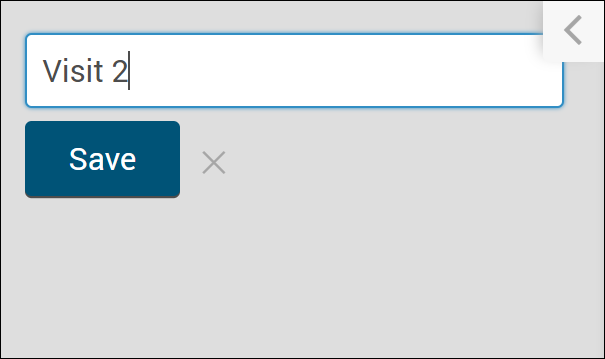
- Click +Add an Event.
- Enter a name for your event.
- To edit details, click on the name of the event.
- Enter values into fields, as needed.
- Click Save.
Edit Settings for an Event/Form:
- Click the name of the event.
- Change settings as needed.
Warning: Once you have moved your study to Production, you cannot change an event to Repeating/Non-Repeating or Visit/Common.
Copy an Event:
- Click on the Menu button next to the name of the event.
- Select Copy.
Note: When you copy an event, any changes you make to one event is applied to the copy.
Archive an Event:
- Click on the Menu button next to the name of the event.
- Select Archive.
Note: Archiving an event removes the event and all associated forms from the study. If a study was previously published, the event was archived, and the study was republished, that event is no longer available within the study. However, archived events can be restored at any time.
Restore an Event:
- Click Archived Items in the header bar.
- Click Restore next to an event you want to restore.
Note: Restoring an event restores all of its forms. You can restore an event with only a specific form by clicking Restore next to the form.
Forms
You can use:
Form Designer – a drag-and-drop interface that allows you to add questions and other item types to your form, or
Form Template – a pre-formatted XLS spreadsheet that allows you to define your form
If you use Form Designer, you can add questions manually or select questions from the Content Library.
You can also use both Form Designer and the Form Template.
Warning: If you use both, be aware that if you start with the Form Template, edit the form in Form Designer, and then try to download the XLS spreadsheet again, it will be formatted differently from the original.
For more information on creating forms, see Using Form Designer or Using the Form Template.
Download the Form Template:
In Study Designer, click Form Template in the header to download the Form Template.
Best Practice: If you have previously downloaded the Form Template, make sure to download it again to get the most recent version.
Upload a Form Definition:
- Click on the name of the form.
- Click the Upload button to upload a form.
- (Optional) Click the Preview button to preview a form.
Enter Form Designer:
- Click the Form Card.
- Click the Design button.
Preview a Form:
Click Preview on the Form Card to view and test your form, including edit checks, conditional fields, and calculations.
Note: Cross-form logic does not function as it does in Study Runner (i.e. the published study). You cannot save data in Preview mode, and the Close and Complete buttons do not appear.
If the Participate module has been activated, and you select the Participate Form under Properties, this option appears as Preview (as a Participant).
Copy a Form to another Event:
- Click the name of the form.
- Click on the Menu button in the corner of the form.
- Select Copy To.
Archive a Form:
- Click the name of the form.
- Click on the Menu (hamburger) button in the corner of the form.
- Select Archive.
Archive a Form Version:
- Click the name of the form.
- Click on the Version Options Menu (hamburger) button next to the form version you wish to archive. Note: If the form version you have selected is set as the default form version, this option will not appear. Instead, select a different form version as default, or follow the instructions above to archive the entire form (if it has only one version).
- Select Archive.
Note: Archiving a form is different from archiving a form version. Archiving a form removes the form from the associated event. Archived forms will be viewable in the study but no longer be editable. Data in archived forms is not included in extracts.
The same form can be used for multiple events. In this case, archiving the form in one event does not have any impact on the form in another event.
Archived forms can be restored at any time. If you archive or unarchive a form you need to publish your study for this to take effect.
Restore a Form:
- Click the Archived Items button in the header.
- Select Forms.
- Click the Restore button next to the form you want to restore.
Restore a Form Version:
- Click the Archived Items button in the header.
- Select Forms.
- Click the Restore button next to the form version you want to restore.
Form Properties
Form properties can be edited on the form card.
| Icon | Form Property | Description | Example |
 | Hide from site users | The Form is hidden at the site level but is accessible from the study level. | This is used when study users, but not site users, should see the form. This could include cases such as forms with data imported from another source or forms for review or adjudication. |
 | Required | The Form must be completed in order for the Event to be completed. | A Participant would be required to complete a consent Form to participate in the study. |
| (No icon) | Allow Add Another (Common repeating events) | Allows the user to add a new instance of a Form in a common repeating Event. If the user clicks the Add Another checkbox, when they click Close or Complete, another instance of the Form automatically appears. | |
 | Participate Form (Participate Property) | Allows the Participant to enter their own data with the use of OpenClinica Participate. (This checkbox is not available if the Participate module has not been activated.) | A Participant might be asked to complete a questionnaire to evaluate potential side effects of a new medication. |
 | Public URL (Participate Property) | Allows participants to self-register for a study. Configure forms to allow Public URL within Study Designer and then create the form URL within the Site Configurations page in Study Runner. (This checkbox is not available if the Participate module has not been activated.) | This URL can be shared in a public forum, such as a subway advertisement, social media post, etc., which can help attract potential participants. |
 | Offline Capable (Participate Property) | Allows research staff to enter form data even if they do not have internet service available. Configure forms by selecting Public URL and Offline Capable in Study Designer and then create the form URL within the Site Configurations page in Study Runner. (This checkbox is not available if the Participate module has not been activated. Additionally, the Public URL checkbox needs to be selected in order for the Offline Capable checkbox to appear.) | This allows data to be gathered in remote locations that do not have access to the internet. |
Set Form Properties:
Click the checkboxes on the Form Card.
Best Practice:
Use Permission Tags instead of setting the Form to Hide from site users for more flexibility.
SDV Requirements
Forms may or may not require Source Data Verification (SDV), depending on the study protocol. Data Managers and Administrators can specify the level of SDV requirement for each item on a form in Study Designer. Below is a table that displays basic definitions of each SDV Requirement.
| Icon | SDV Requirement | Description |
| (No Icon) | Not Applicable (Default) | SDV is not applicable for this form. |
 | Not Required | SDV is not required for the form, but you can still perform SDV if you want. This is often used when 10% of forms need to be SDVed. Each form record is verified or unverified all together, rather than item-by-item |
 | Partial Required | Some fields on the form must be verified. Each form record is verified or unverified all together, rather than item-by-item |
 | 100% Required | Every field in the form must be verified. Each form record is verified or unverified all together, rather than item-by-item |
 | Item-Level | Item-Level SDV allows you to choose which items will be part of SDV by selecting Required, Optional, or Not Applicable for each individual item on a form. Item records will then be marked as Verified or Not Verified independently and will become unverified independently if their data changes on the form. |
 | Item-Level (To be configured) | This indicates Item-Level SDV was selected, but is not configured validly since all items are set to Not Applicable. Use the Configure SDV link on the form card in Study Designer to set each item to Required, Optional, or Not Applicable. At least one item needs to be Required or Optional, otherwise change the form’s SDV Requirement to Not Applicable. |
Not all forms will have all SDV Requirement options available. The SDV options are related to when the form was created and when it was published to Production in relation to the Stack 15 release (December 20th, 2021). The SDV options on forms are as follows:
- Form first published to Production prior to Stack 15 release: Not Applicable, Not Required, Partial Required, 100% Required
- Form created prior to Stack 15 release, but not yet published to Production: Not Applicable, Not Required, Partial Required, 100% Required, Item-Level
- Form first published to Production after Stack 15 release with one of the following statuses – Not Required, Partial Required, 100% Required: Not Applicable, Not Required, Partial Required, 100% Required
- Form first published to Production after Stack 15 release with one of the following statuses – Not Applicable, Item-Level: Not Applicable, Item-Level
- Form created after Stack 15 release: Not Applicable, Item-Level
- Individual items have the following SDV Requirement options: Required, Optional, or Not Applicable
- When first selecting Item-Level on a form, the item is set to Optional by default. Additional items that are added will default to Not Applicable.
- Individual items have the following SDV Requirement options: Required, Optional, or Not Applicable
Set SDV Requirements:
Click the SDV drop-down menu on the form card and select the requirement level you want to apply to the form. If Item-Level is the selected requirement, click the Configure SDV link to select which items will require SDV.
Item-Level SDV Requirements:
- Not Applicable: items cannot be verified
- Optional: items can be verified
- Required: items must be verified for the form to be fully verified and get Verified status
If all items will have the same SDV Requirement, click in the Update All To menu, select the appropriate requirement and click Apply. For any items that need a different requirement, select the SDV Requirement for the item’s row to update it. Then, return back to the form card.
Form Drafts and Versions
Form Versions will be pushed to Study Runner when you publish your study, form Drafts will not. Form Drafts are created when you build a form using Form Designer. When you are ready, you can promote a Draft to a Version to set it up for publishing.
When you initially upload a Form Template, your form automatically becomes a version. This appears under Versions on the form card.
You can make changes to the Form Template and upload new versions or overwrite the existing version. If the version specified on the Form Template’s settings tab is the same as an existing version on the form card, the system will overwrite that version upon upload. If the version specified on the Form Template’s settings tab is different, the system will create a new version of that form upon upload.
When you create a form in Form Designer and save it, it becomes a draft and appears under Drafts on the form card. You can make changes as needed, and if you have multiple drafts, the most recent draft is moved to the top of the list with the label, (latest).
When you create a draft, it does not:
- Create a new version
- Appear when you publish your study
- Appear in the Audit Log
You can promote the draft to a version to include it in your study when you publish it. To promote a draft to a version: click the hamburger menu next to the draft you wish to promote and select Add to Study.
Warning: If you do not want the new form to overwrite an existing form:
- In Form Designer: change the number in the Version number field on the Layout & Settings panel.
- In the Form Template: update the Form Version on the template’s Settings tab.
Once a form has been published to Production, it cannot be overwritten. The system will require you to create a new version.
Drafts
Access the Drafts Menu:
Click the Menu button under Drafts to access a list of Version Options.
Add a Draft to Your Study/Make the Draft a Version:
- Click the Menu button next to the draft you want to add to your study/promote to a version.
- Select Add to Study.
Edit the Draft in Form Designer:
- Click the Menu button next to the draft you want to edit in Form Designer.
- Select Design.
Upload Media & External Lists:
- Click the Menu button next to the draft you want to upload media and/or external lists to.
- Select Upload.
Download the Draft:
- Click the Menu button next to the draft you want to download.
- Select Download.
Warning: If you upload the Form Template, edit it in Form Designer, and then download the form, the spreadsheet will be formatted differently from the original.
Permanently Delete the Draft:
- Click the Menu button next to the draft you want to permanently delete.
- Select Discard.
Versions
Access the Versions Menu:
Click the Menu button under Versions to access a list of Version Options.
Edit the Version in Form Designer:
- Click the Menu button next to the version you want to edit in Form Designer.
- Select Design.
Preview the Version:
- Click the Menu button next to the version you want to preview.
- Select Preview.
Download the Version:
- Click the Menu button next to the version you want to download.
- Select Download.