2.1.1 Define Dataset
To define a dataset for the current Study or Site, perform the following steps:
- Select Tasks > Create Dataset.
The Create Dataset page for the current Study or Site opens. - Click Proceed to Create a Dataset.
The Create Dataset: Select Items page opens.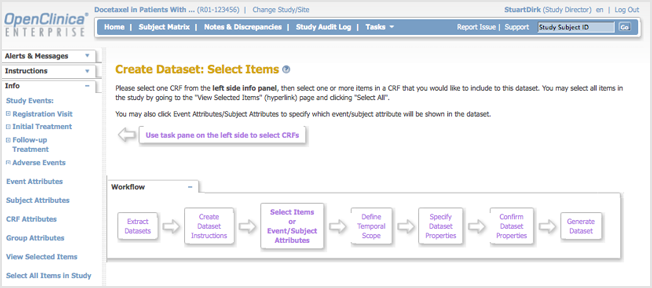
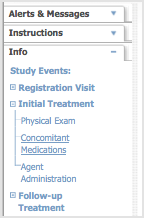
- In the Info sidebar panel, click an Event, and then click a CRF for the Event that you want to include in the dataset definition. For the example shown, the Initial Treatment Event was selected, and then the Concomitant Medications CRF for the Event was selected. You can add more Event CRFs in a later step.
After clicking an Event CRF, a table displays, listing all of the Event’s CRF Items you can include in the dataset definition. It also lists the metadata for each item, which was defined when the CRF was created.
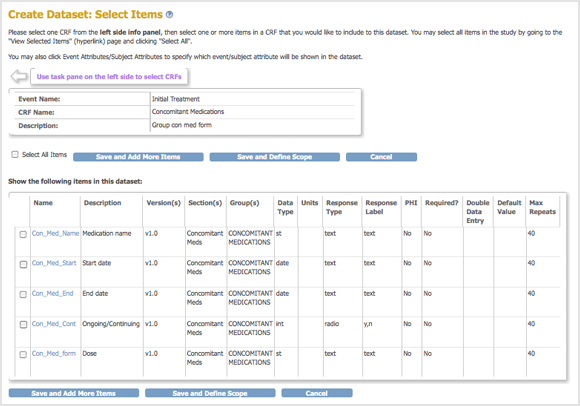
- In the table, select the checkbox for each Item to include in the dataset definition, or select the Select All Items checkbox. If you are selecting many but not all Items in the CRF, you might find it easier to use Select All Items, then for each item you want to exclude, select its checkbox to clear it.
Note: With some large studies (> 10,000 Items), the ‘Select All’ function may not work. If this is the case you will have to manually select each Item you want in your dataset.
- If you want to add more Event CRFs:
- Click the Save and Add More Items button.
- Repeat steps 3 to 5 to select the Event CRF Items to include in the dataset definition.
- To see the Items already selected, click the View Selected Items link in the Info sidebar panel.
If you want to select all Items for all CRFs for all Events, instead of selecting each Event and CRF, instead click Select All Items in Study in the Info sidebar panel.
- To select non-CRF Attributes to include in the dataset definition, click the link for it in the Info sidebar panel.
The Create Dataset: Select Attributes page opens for the option you chose.
For example, when you click Subject Attributes, the Create Dataset: Select Subject Attributes page opens.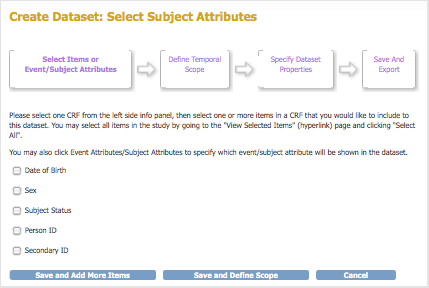
- Select the checkbox for each Attribute to include.
- If you want to include Attributes of a different type:
- Click Save and Add More Items.
- Repeat steps 6 to 8 to select additional Attributes to include in the dataset definition.
- To see the Attributes already selected, click the View Selected Items link in the Info sidebar panel.
- After selecting all Items and Attributes you want to include in the dataset, click the Save and Define Scope button.
The Create Dataset: Define Temporal Scope page opens.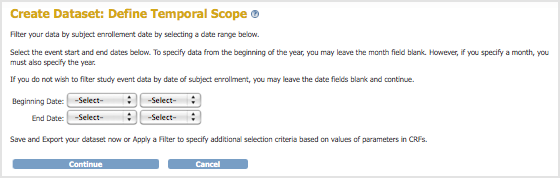
- Set a date range for the dataset definition by following the onscreen instructions: the date you specify is the Subject enrollment date. For example, if you select 2011 for the year for the Beginning Date and Ending Date, the dataset will include all Subjects who enrolled in 2011. After specifying the date range, click the Continue button.
The Create Dataset: Specify Dataset Properties page opens.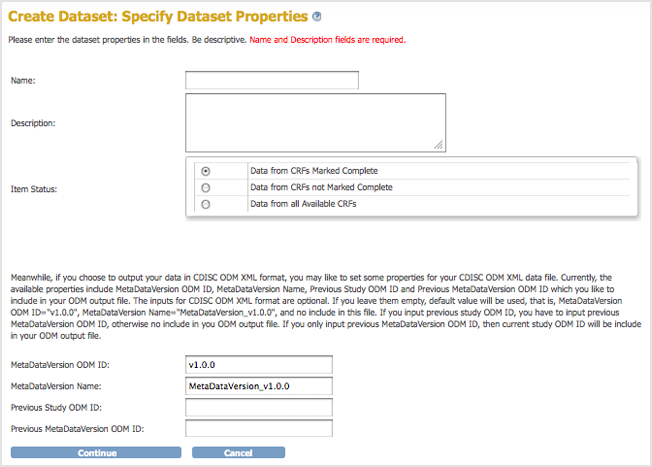
- Provide a Name and Description for the dataset definition, and optionally, change the Item Status. You can also specify ODM ID values, which you might use if you export the dataset to an ODM file format. Then click Continue.
The Create Dataset: Confirm Dataset Properties page opens. - Verify the Name and Description, then click Confirm and Save.
The Download Data page opens. Now that the dataset definition exists, at any time you can generate and download a file containing all data that matches the criteria you specified.
2.1.2 Generate and Download Dataset
- After creating, editing, or selecting a dataset definition, the Download Data page displays. On the page, click Run Now for the file format you want. OpenClinica 3.11 introduced SAS Data and Syntax file formats. For more information about the file formats, see Formats for Dataset Files.

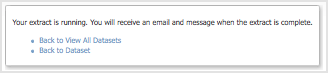
- OpenClinica displays a page that reports your extract is running. OpenClinica maintains a queue of dataset extracts, including scheduled jobs and dataset extracts initiated by other users. New data extract requests are added to the end of the queue. You can view the queue to see where your data extract is in the list. For more information, see View or Cancel Data Exports. After a few moments (or longer, for a large dataset or when there were already other requests in the queue), the dataset file is available. To view it, click Back to Dataset.
- The Download Data page displays again, and the dataset you generated is listed in the Archive of Exported Dataset Files table. The example below shows a dataset generated with an Excel Spreadsheet format. Click the Download icon
 in the Actions column for the dataset.
The file downloads using your web browser’s download features. For more information, see Downloading Datasets.
OpenClinica also sends an email to you that contains a link to the dataset file, providing another way for you to access the file, if that option was specified in the datainfo.properties file as part of your system configuration. - Open the file to verify that it contains the data you expected. If not, you can edit the dataset definition in OpenClinica and generate the dataset file again.
Data in the dataset file reflects the OpenClinica database at the time the dataset file is generated, not at the time you download the file. The dataset file name includes the date and time the file was generated.
The Archive of Exported Dataset Files table includes only one dataset file for each format for the dataset definition. When you generate a dataset file, if a dataset file having the same format already exists in the table, the file you generate replaces the existing file in the table. If you want both files, download the existing file, and then generate the dataset and download it using a different, or you can edit the dataset definition and save it using a different name and generate a the dataset for it.